Setting Up Your ServiceTitan for the Lace AI CSR
Last updated: August 24, 2026
Invite the Lace AI CSR to ServiceTitan
1. Go to Employees
Settings (⚙) → People → Employees → Add Employee
2. Fill Out Required Info
Employee Name: You choose (examples: Lace AI, Lacey, AI CSR)
Role: Select one of
Dispatcher
CSR/Dispatcher
Any of these work — choose the one that best fits how your team categorizes booking staff.
This gives the AI the correct permissions to:
create jobs
view customer details
check availability
book appointments
Email (must be exact):
aicsr-eng-st@lace.aiPhone Number: Leave blank
Multi-Factor Authentication (MFA): Select Authentication App (TOTP)
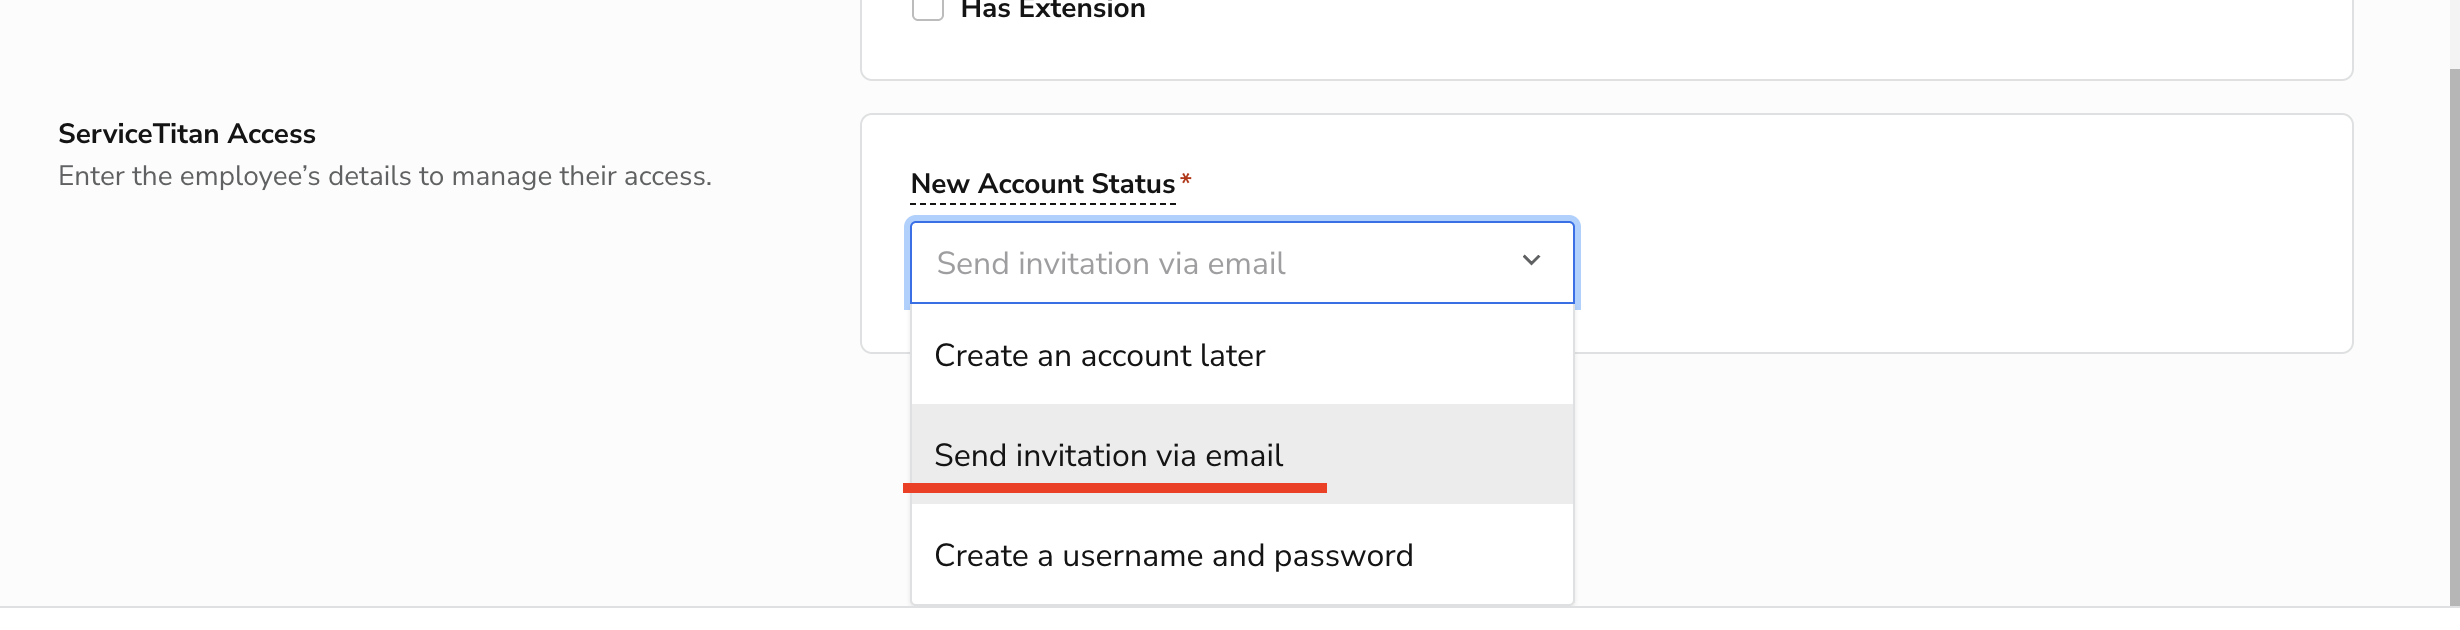
4. Invitation Method — IMPORTANT
Under New Account Status, select:
✅ Send invitation via email
(do not choose any other option)
This sends the login setup link to Lace.
5. Save
Click Save, and you're done.
Create a "Lace AI" Job Tag
1. Open your "Tag Types" Page
Found in Settings -> Operations
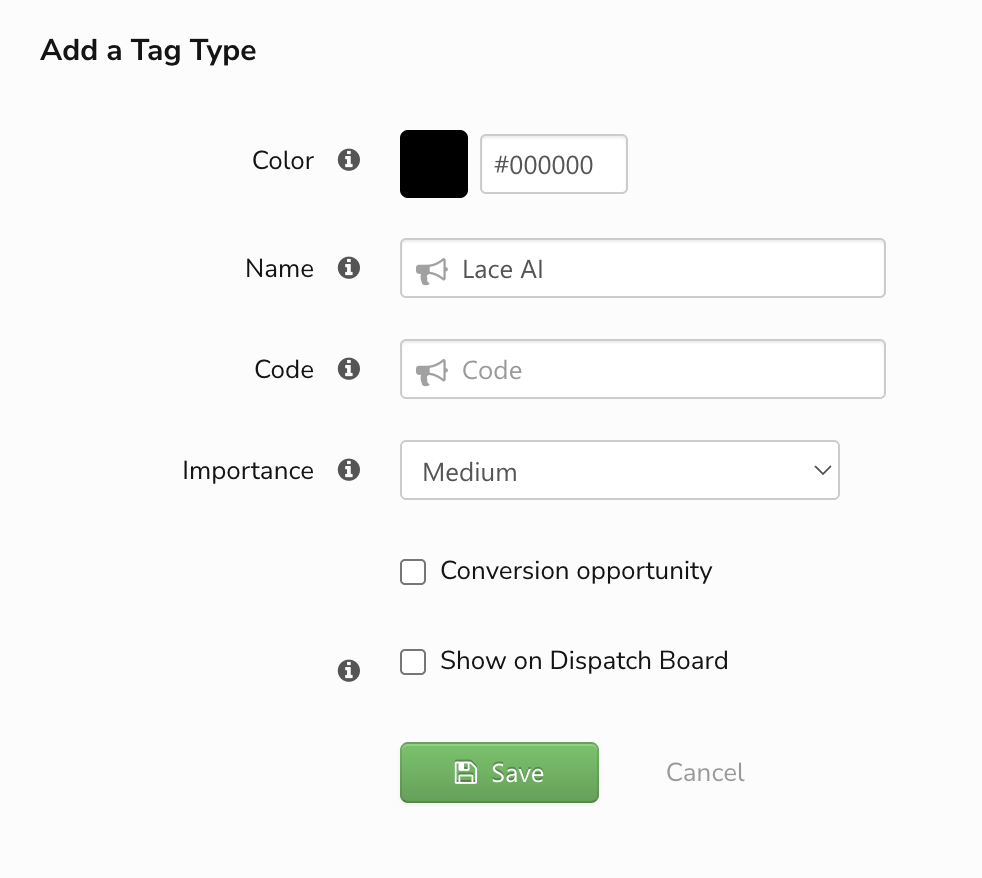
2. Create a Lace AI Job Tag
Click on "Add".
Select your preferred color.
Name the tag "Lace AI".
A code is not necessary, but you may enter a code if you would like.
We usually default to "Medium" importance, but you may choose whichever level of importance you desire.
Do not check "Conversion opportunity".
You may check "Show on Dispatch Board" if you would like the Lace AI tag to be shown on your dispatch board.
Click "Save".
Create a "Lace AI" Fallback Campaign
In the rare cases where an end customer is calling to an un-marketed number, we will need to have a "fallback" campaign to make we can book the job - the marketing field is required for job booking.
1. Open your "Campaigns" Page
Found in Settings -> Campaigns
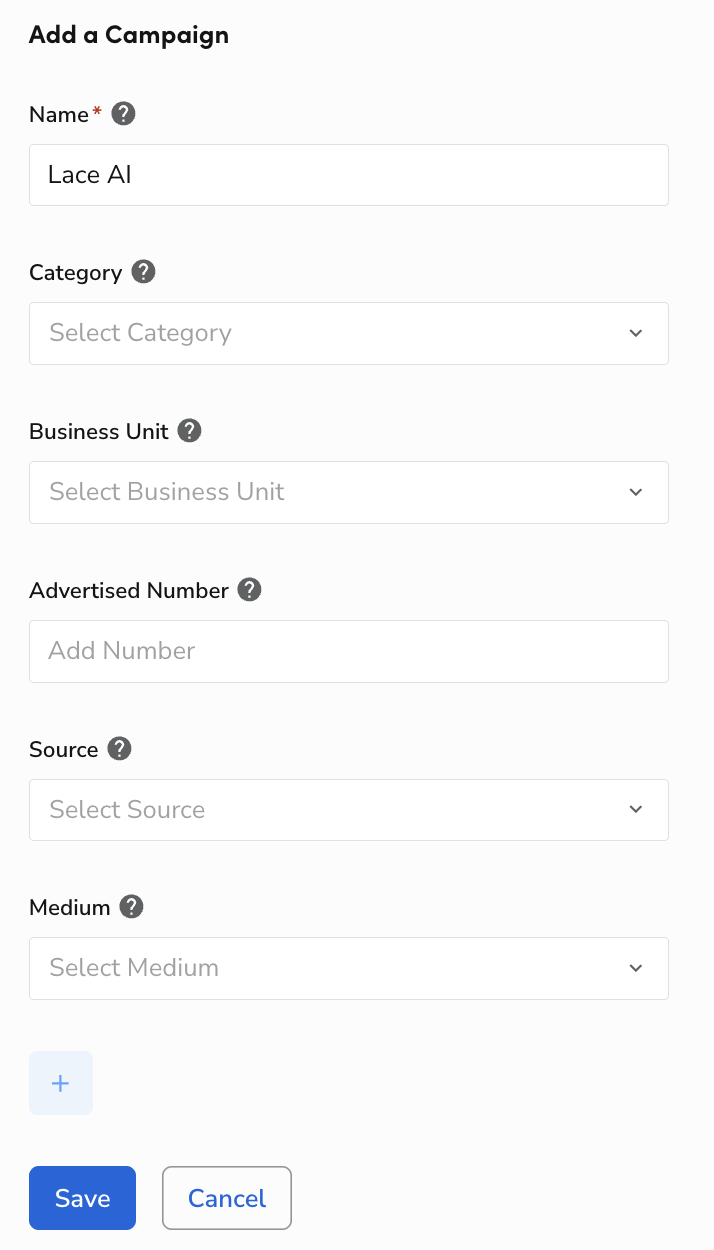
2. Create a "Lace AI" Campaign
Click on "Add".
Enter "Lace AI" in the name field.
For all other fields, there is no specific value required. You are welcome to fill out the other fields with whatever you would like..
Click "Save".
Set Up Zones in ServiceTitan
Zones are required for the AI CSR to book jobs. They tell the AI CSR which geographic areas your business services, so it can properly schedule appointments. Without zones configured, the AI CSR has no way to determine service eligibility for a caller's location.
How to Set Up Zones
Navigate to your Zones screen in ServiceTitan.
Click Add Zone.
Enter:
Zone name (e.g., "North", "Downtown", "Zone 1")
Zone color (useful for visual indicators on boards/schedules)
ZIP codes or cities included in that zone
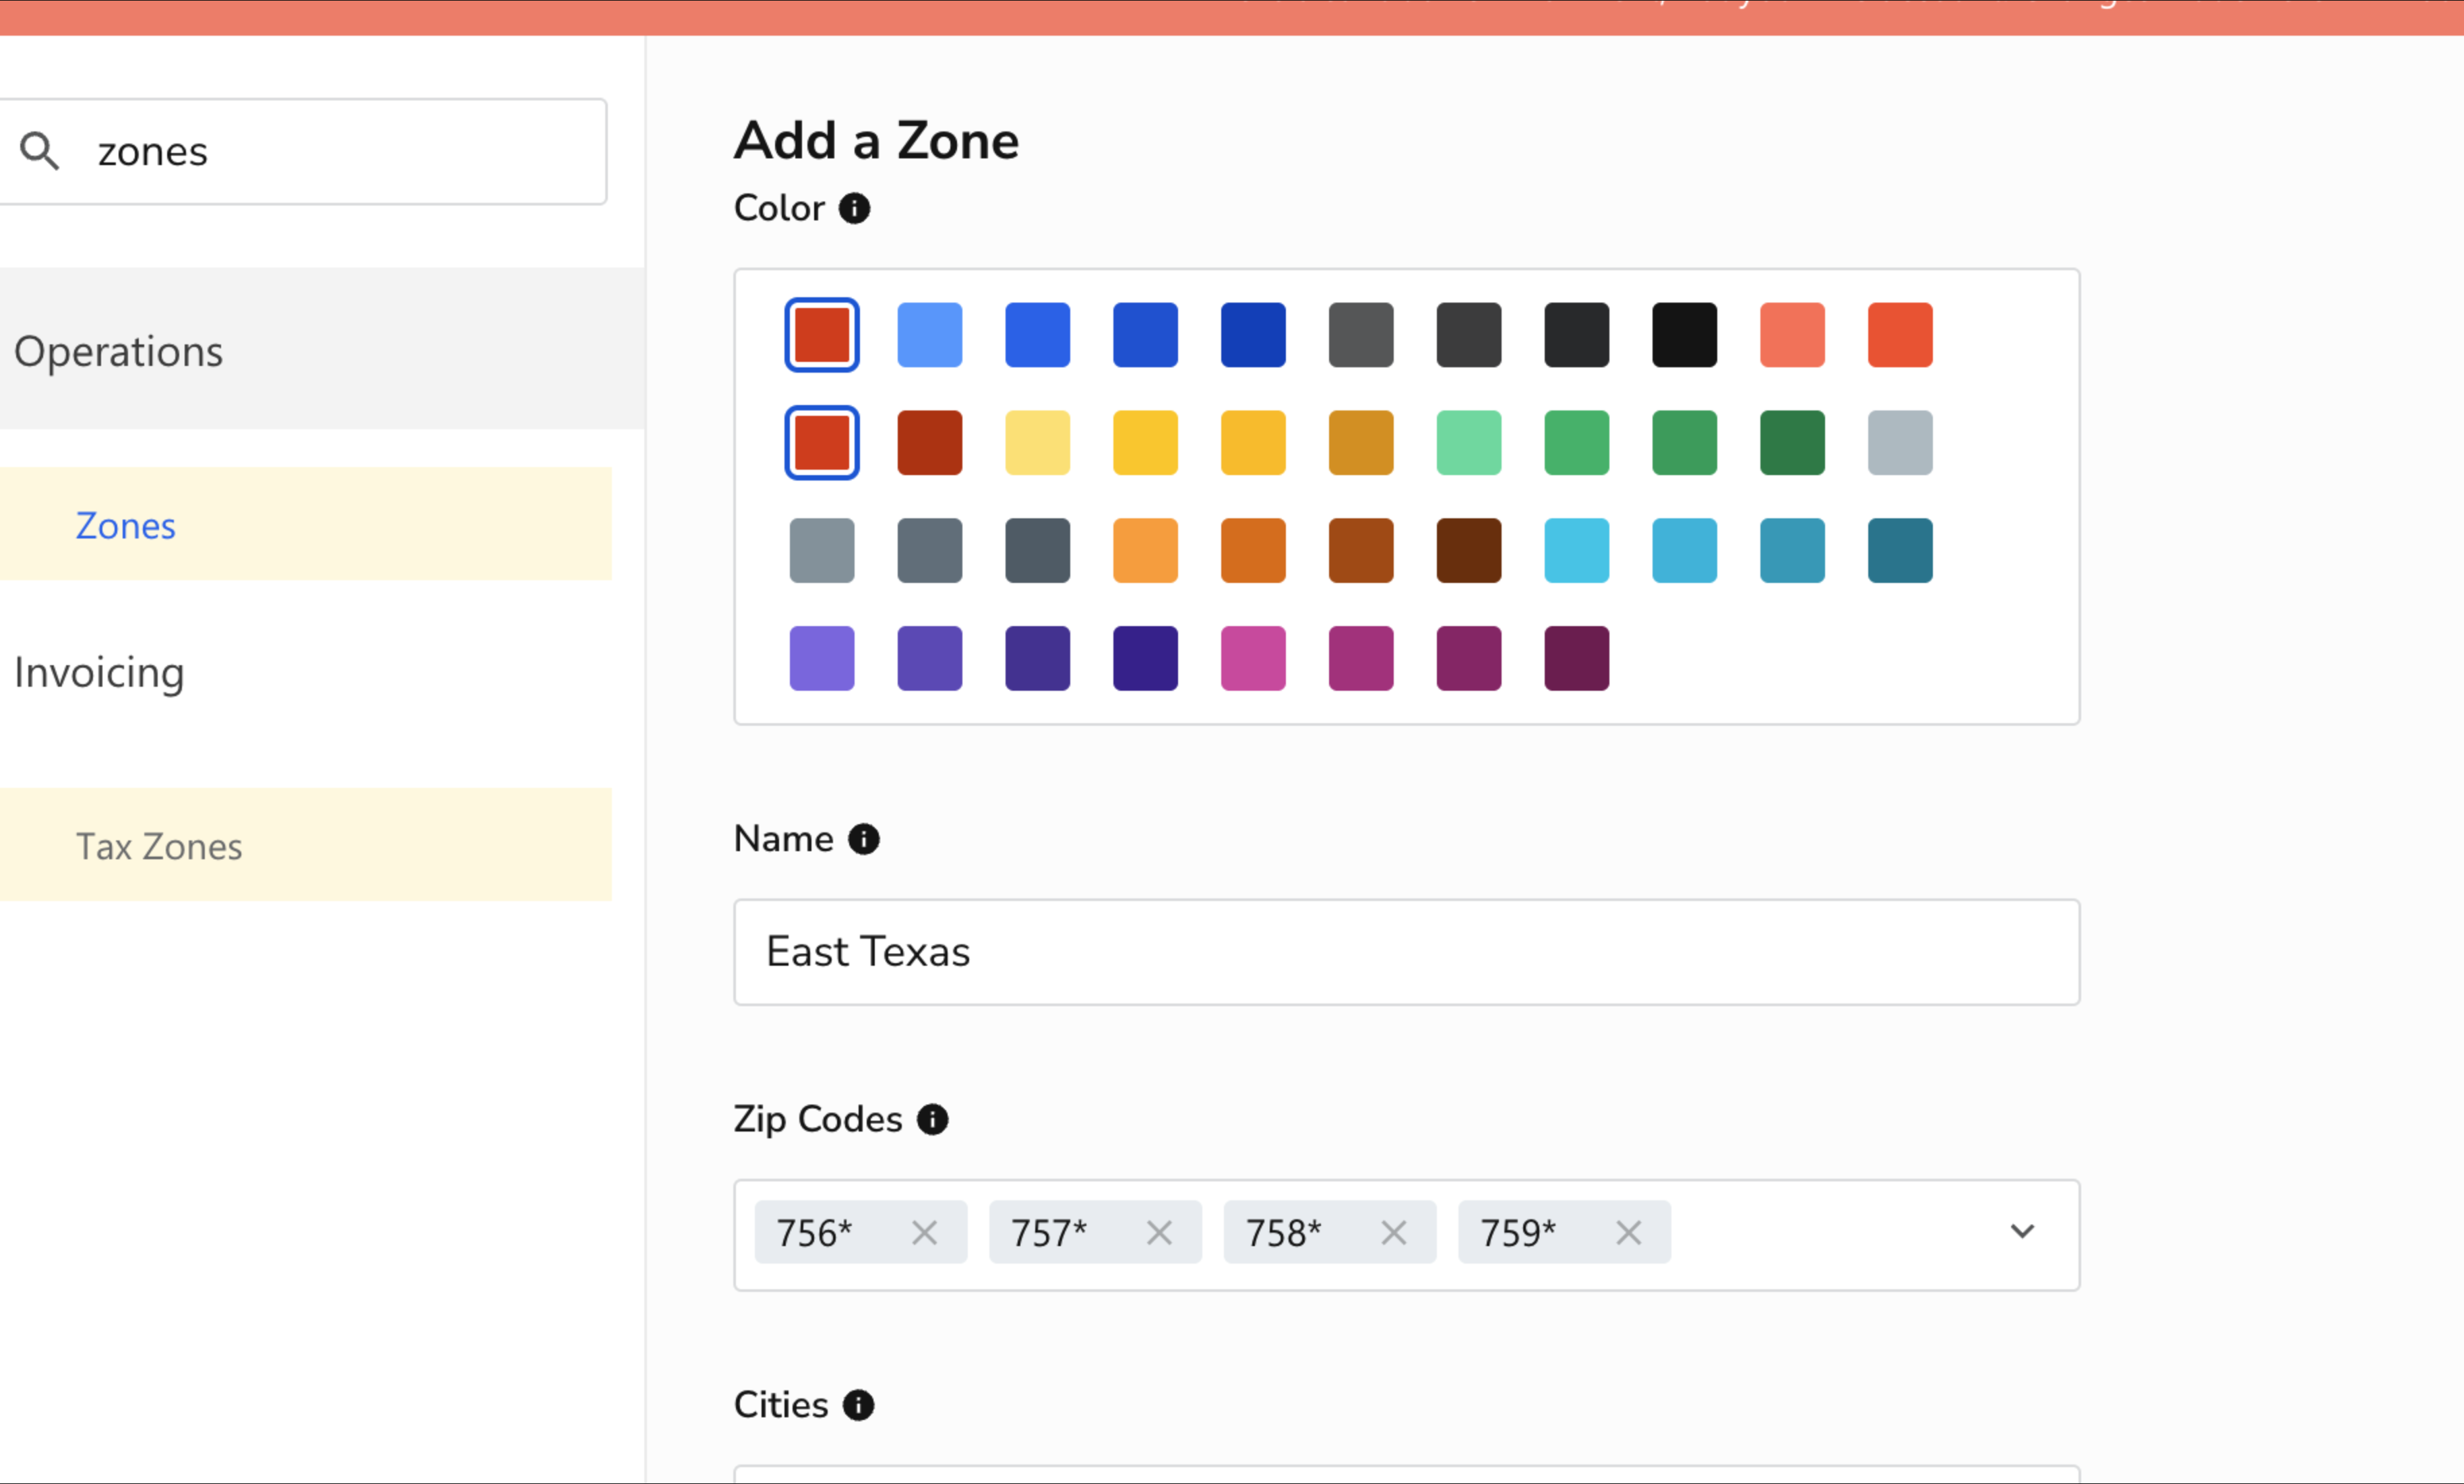
💡 Tip: ServiceTitan supports the asterisk (*) wildcard when entering ZIP codes, letting you define ranges efficiently. For example, to cover East Texas ZIP codes 75601–75999, you can use a wildcard range rather than entering each one individually.
For detailed instructions, refer to the ServiceTitan zones documentation.
💰 Got Zones With Extra Charges? Let Us Know
After setting up your zones, inform the Lace team about any zones that carry additional charges (e.g., extra travel or service fees). This ensures the AI CSR can be configured with the correct pricing information.