RingCentral Access
Last updated: September 30, 2025
1. The following steps must be performed by a user that has administrative
permissions on the RingCentral account - e.g. a Super Admin.
2. Visit developer.ringcentral.com
3. Click on the Login button in the upper right corner
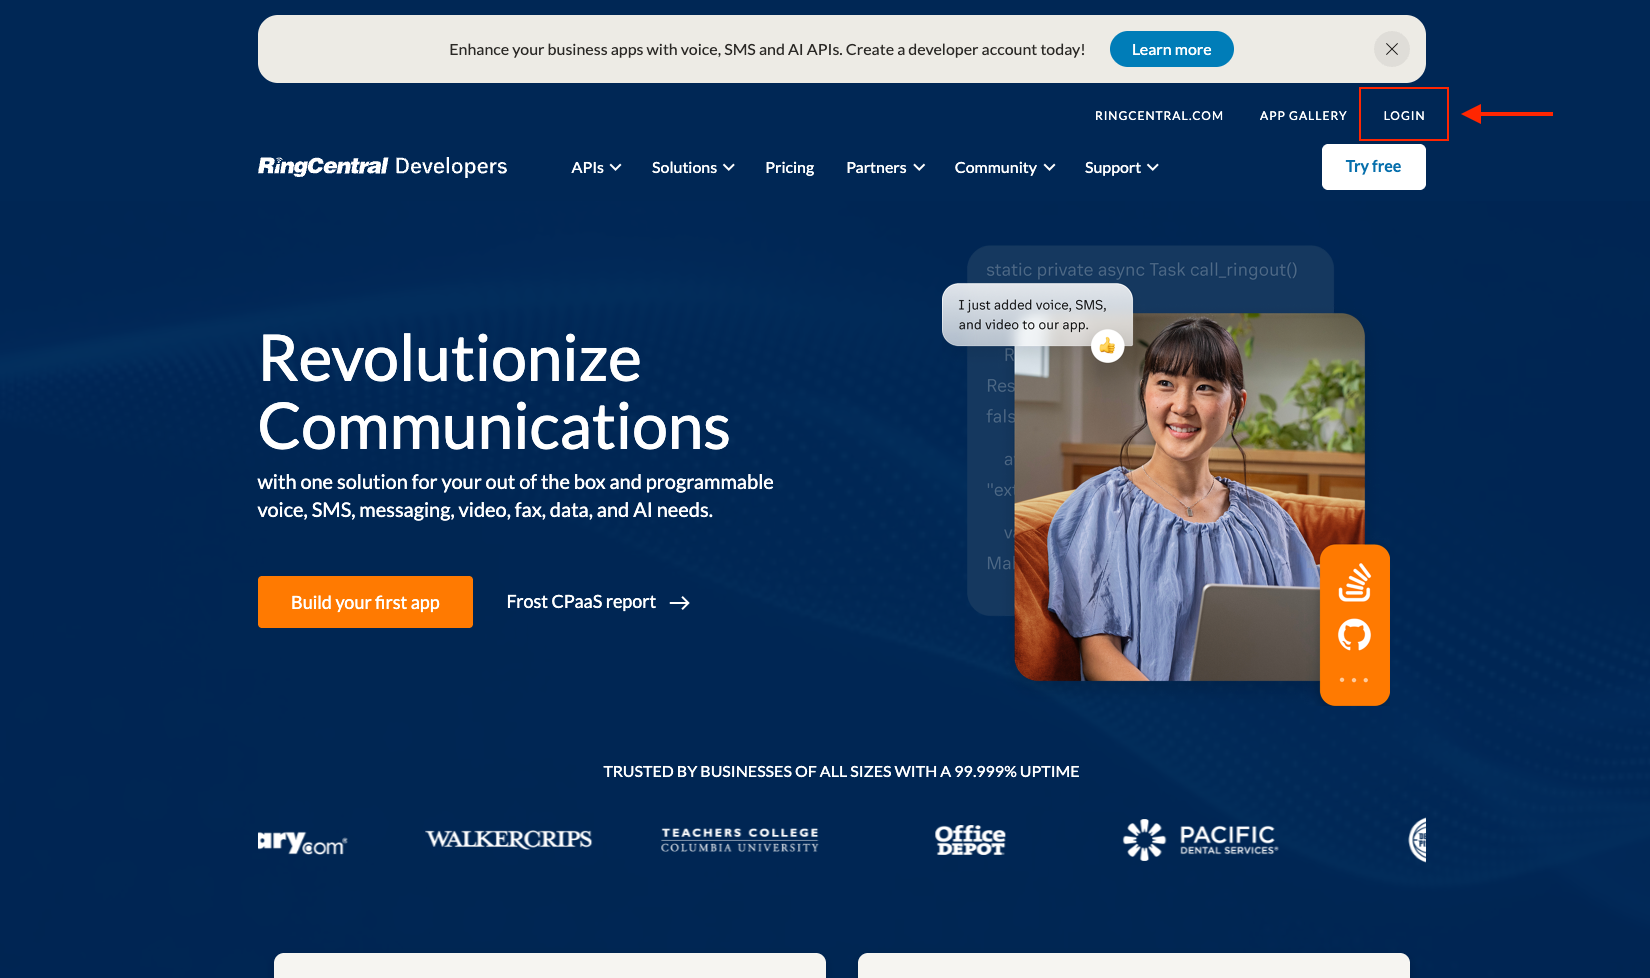
4. If presented with a developer questionnaire, seek the Skip button in the upper
right corner and click it to skip the questionnare
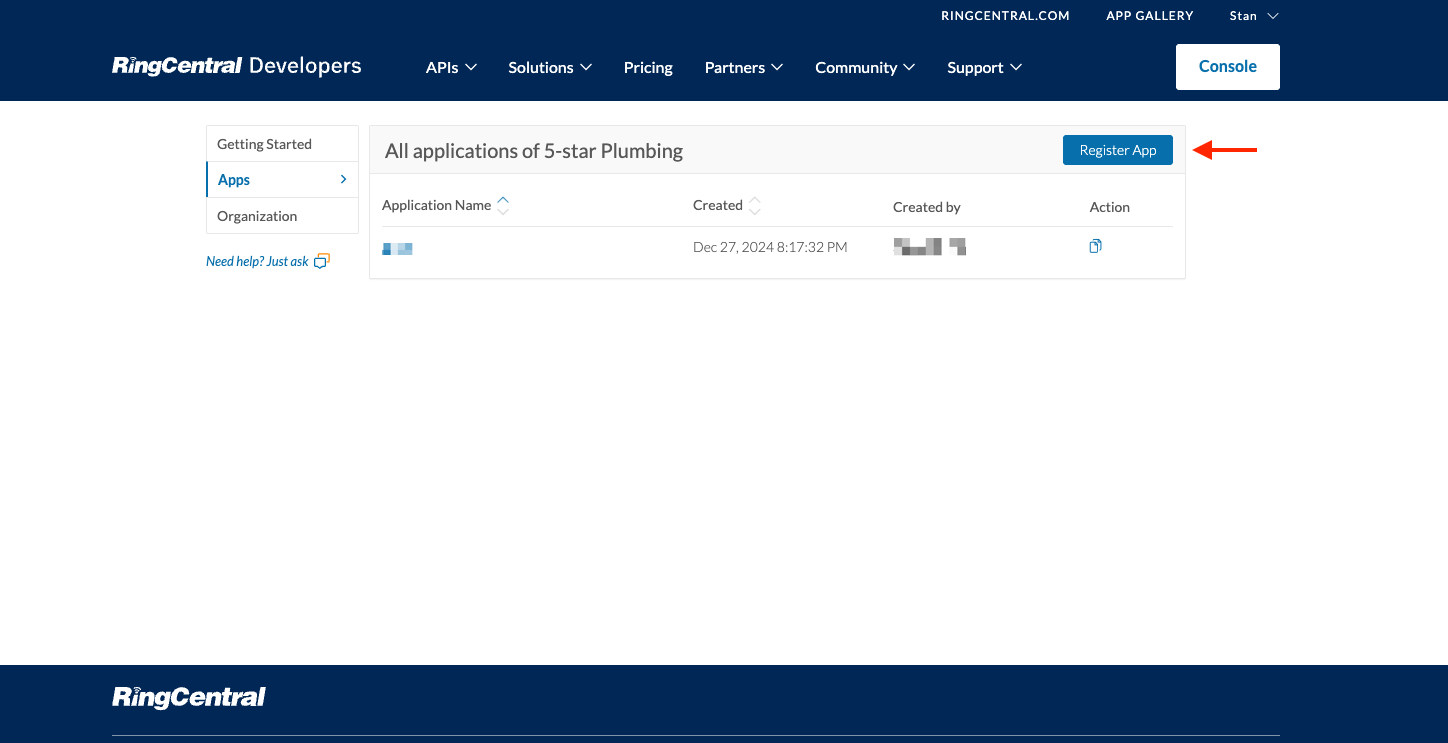
5. You will land on the Applications page of RingCentral
6. Click on Register App
7. You will be asked to select app type. Select “REST API App”
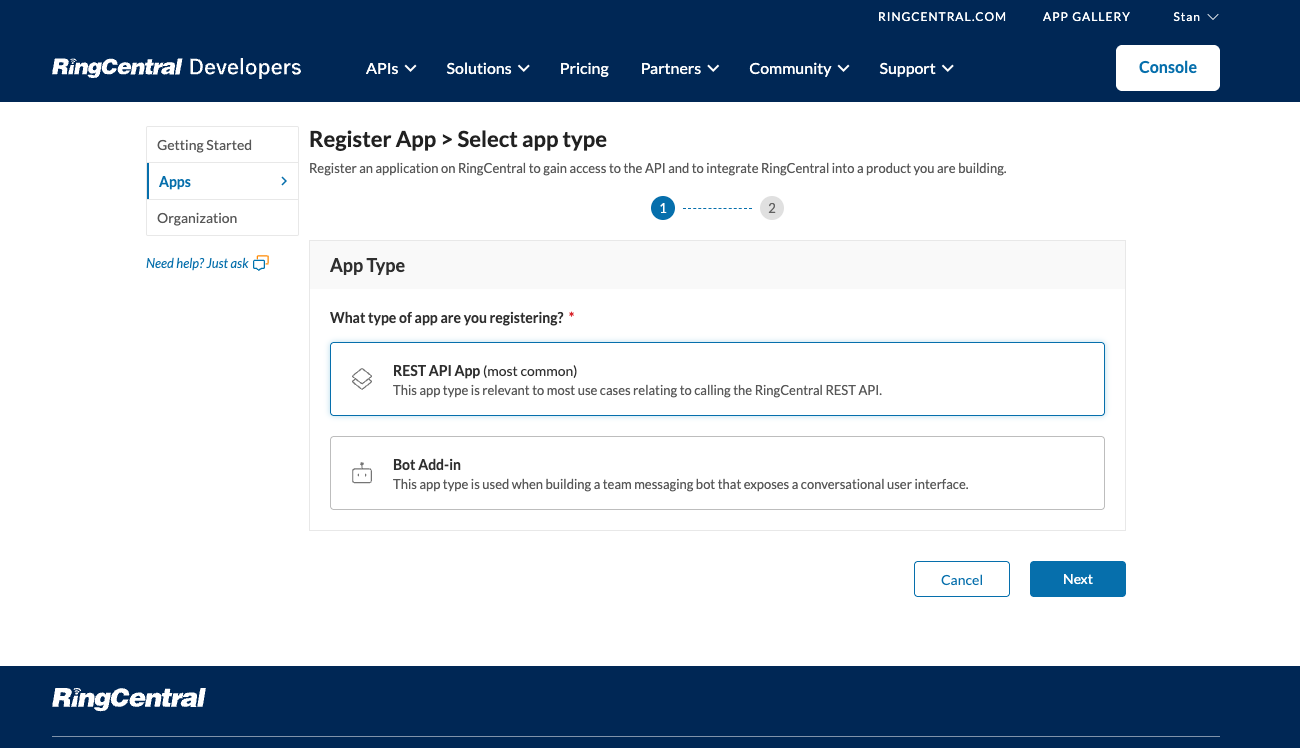
8. Click Next
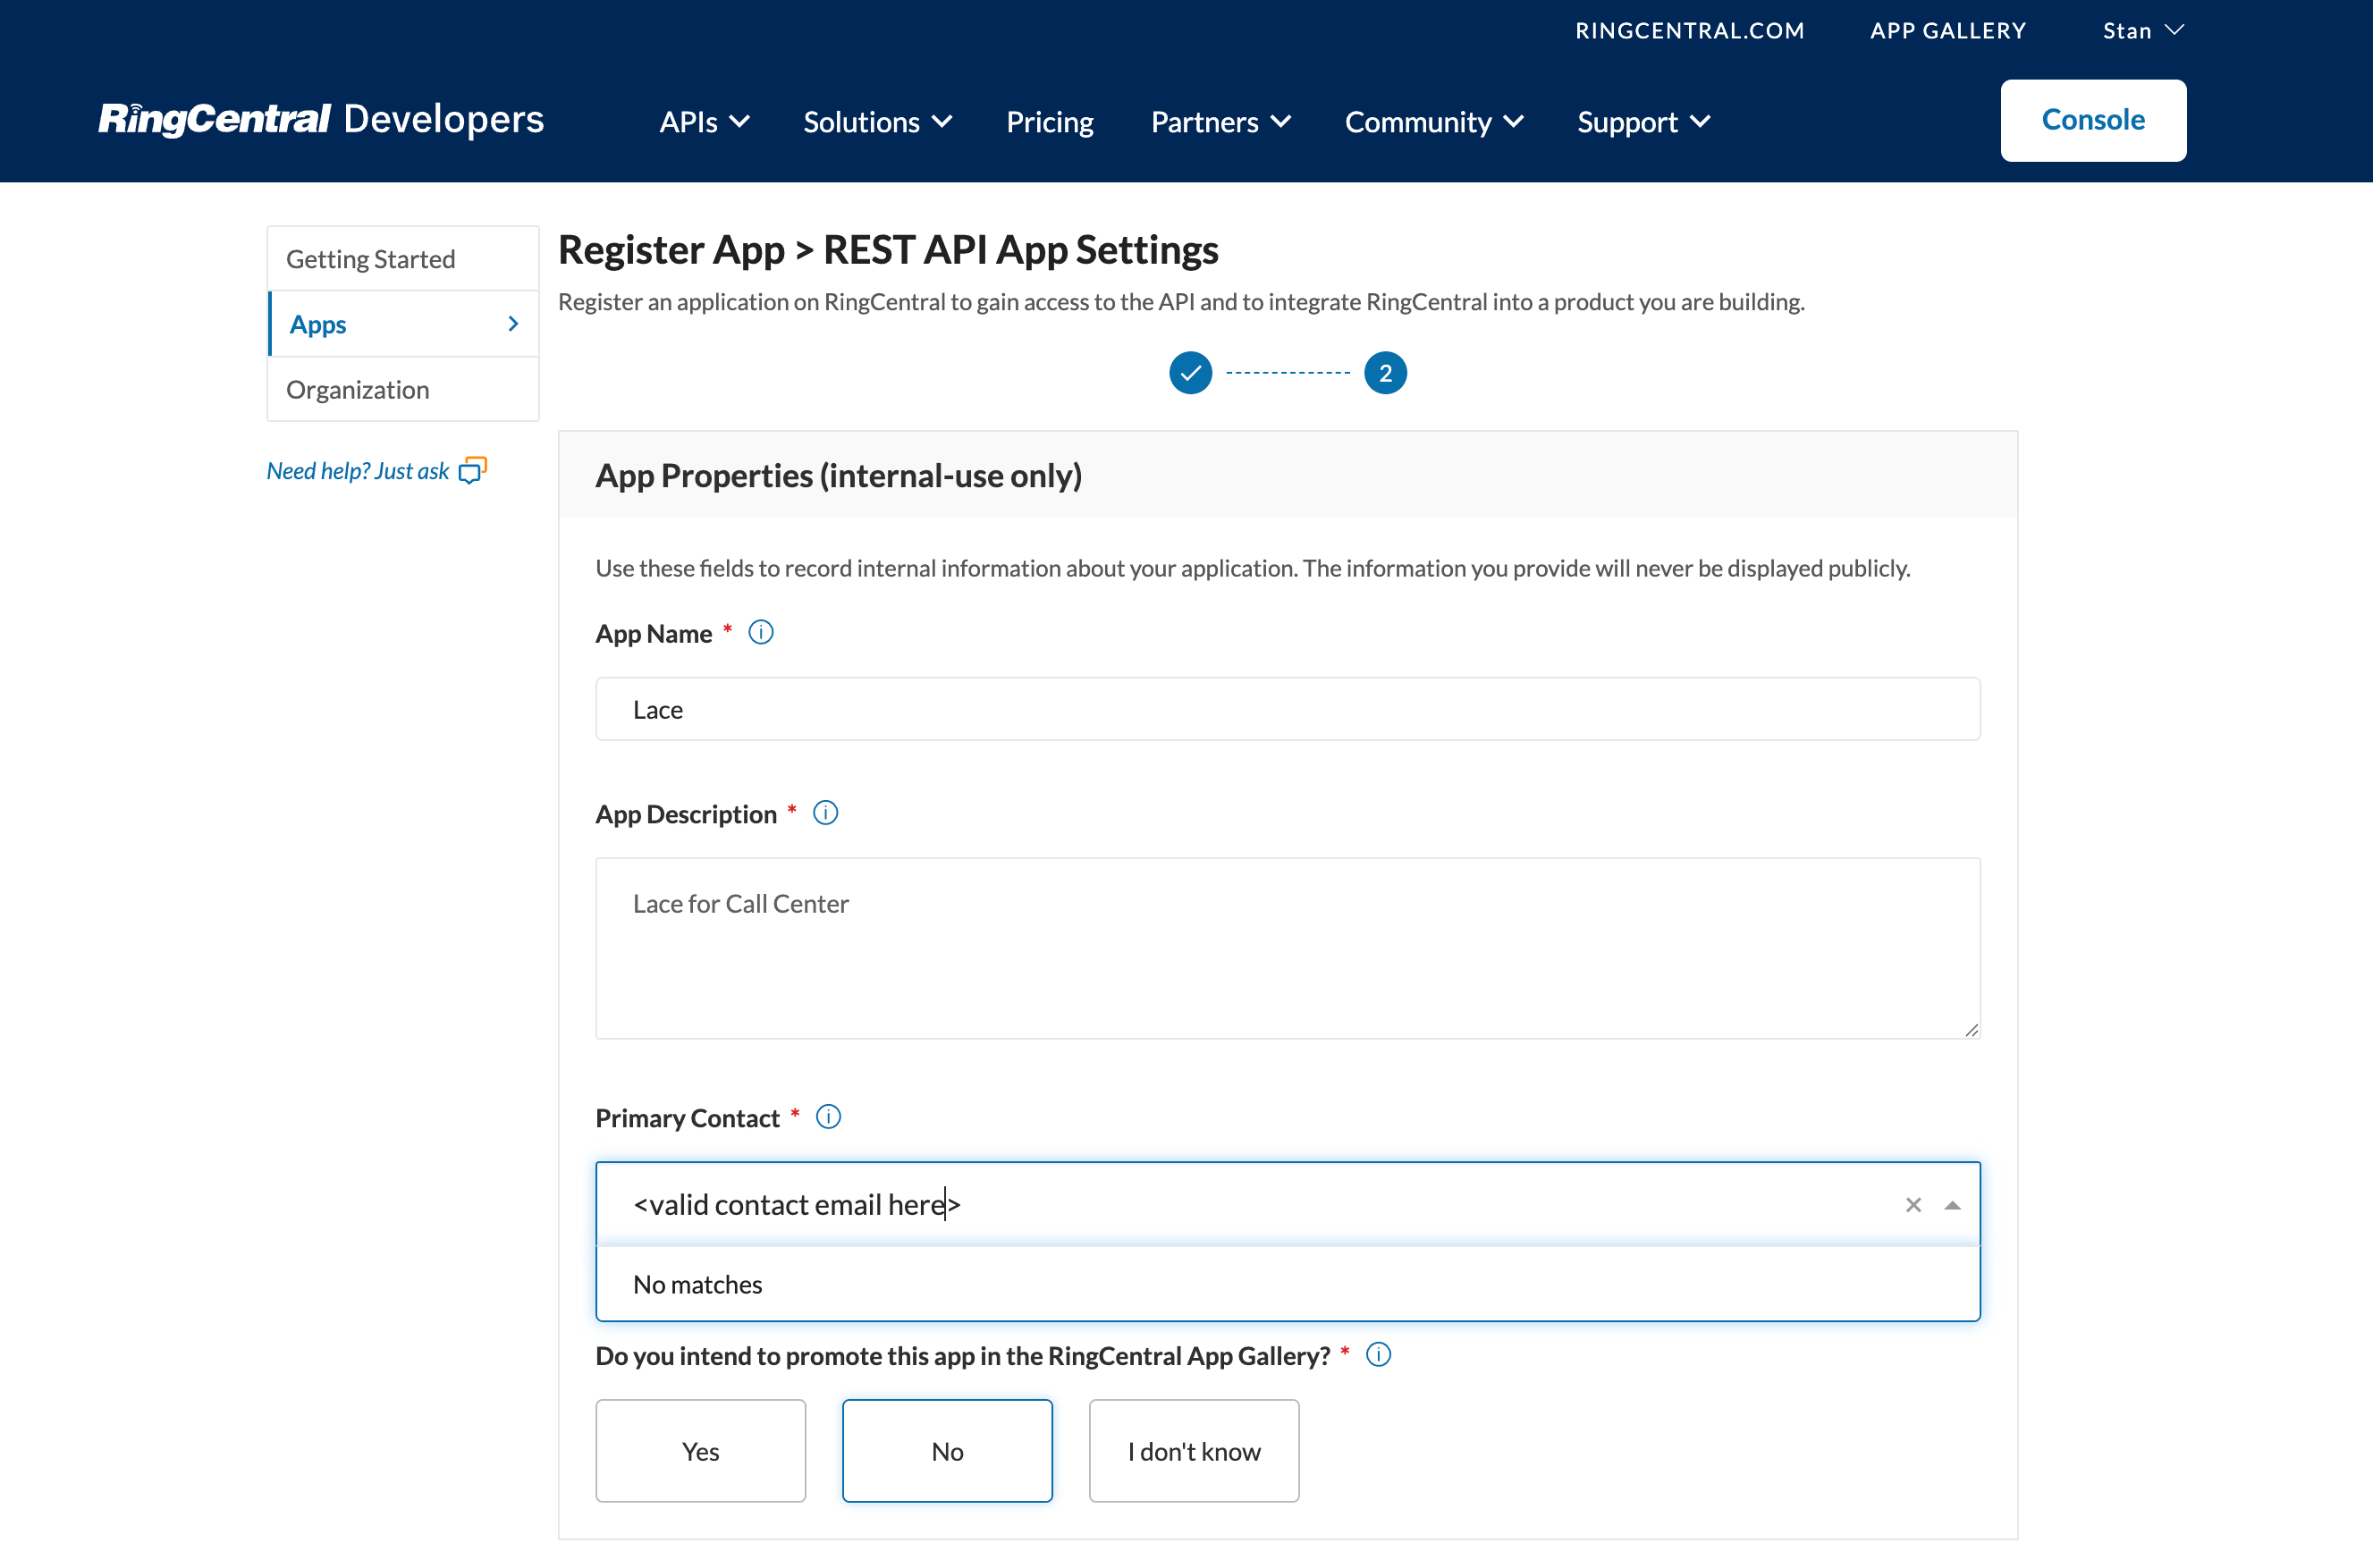
9. You will be asked to fill out the REST API App Settings. Please fill out the App
properties as shown in the picture
Note: Remember to select valid contact for the integration - normally a
RingCentral Admin’s email
10. Leave the App Card properties blank - they are not needed
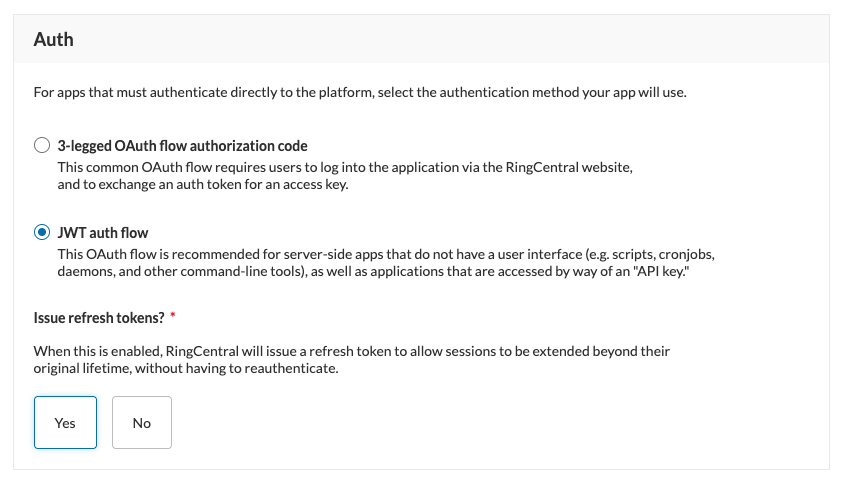
11. Fill out the Auth section as shown in the picture
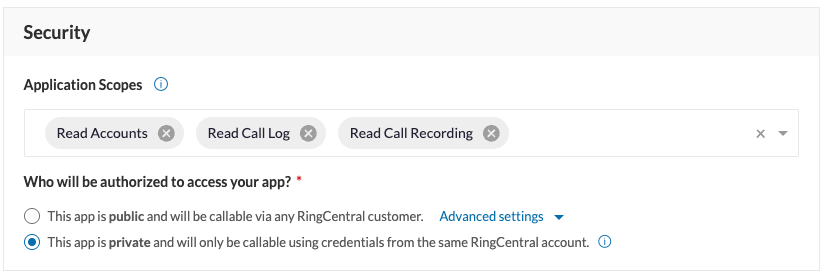
12. In the Security section, please grant the scopes “Read Call Log”, “Read Call
Recording” and “Read Accounts”. Make sure to select the radio button
indicating “This app is private…”
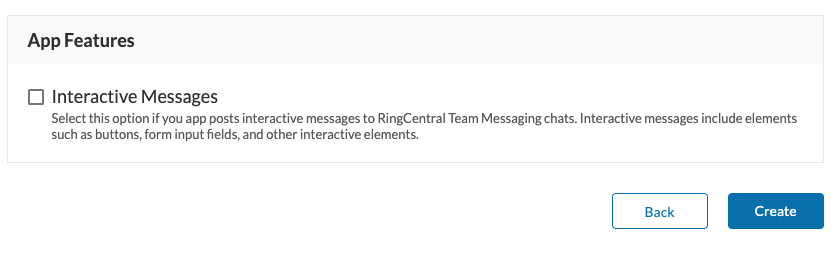
13. Leave the “Interactive Messages” checkbox unchecked.
14. Click Create which will create the new app
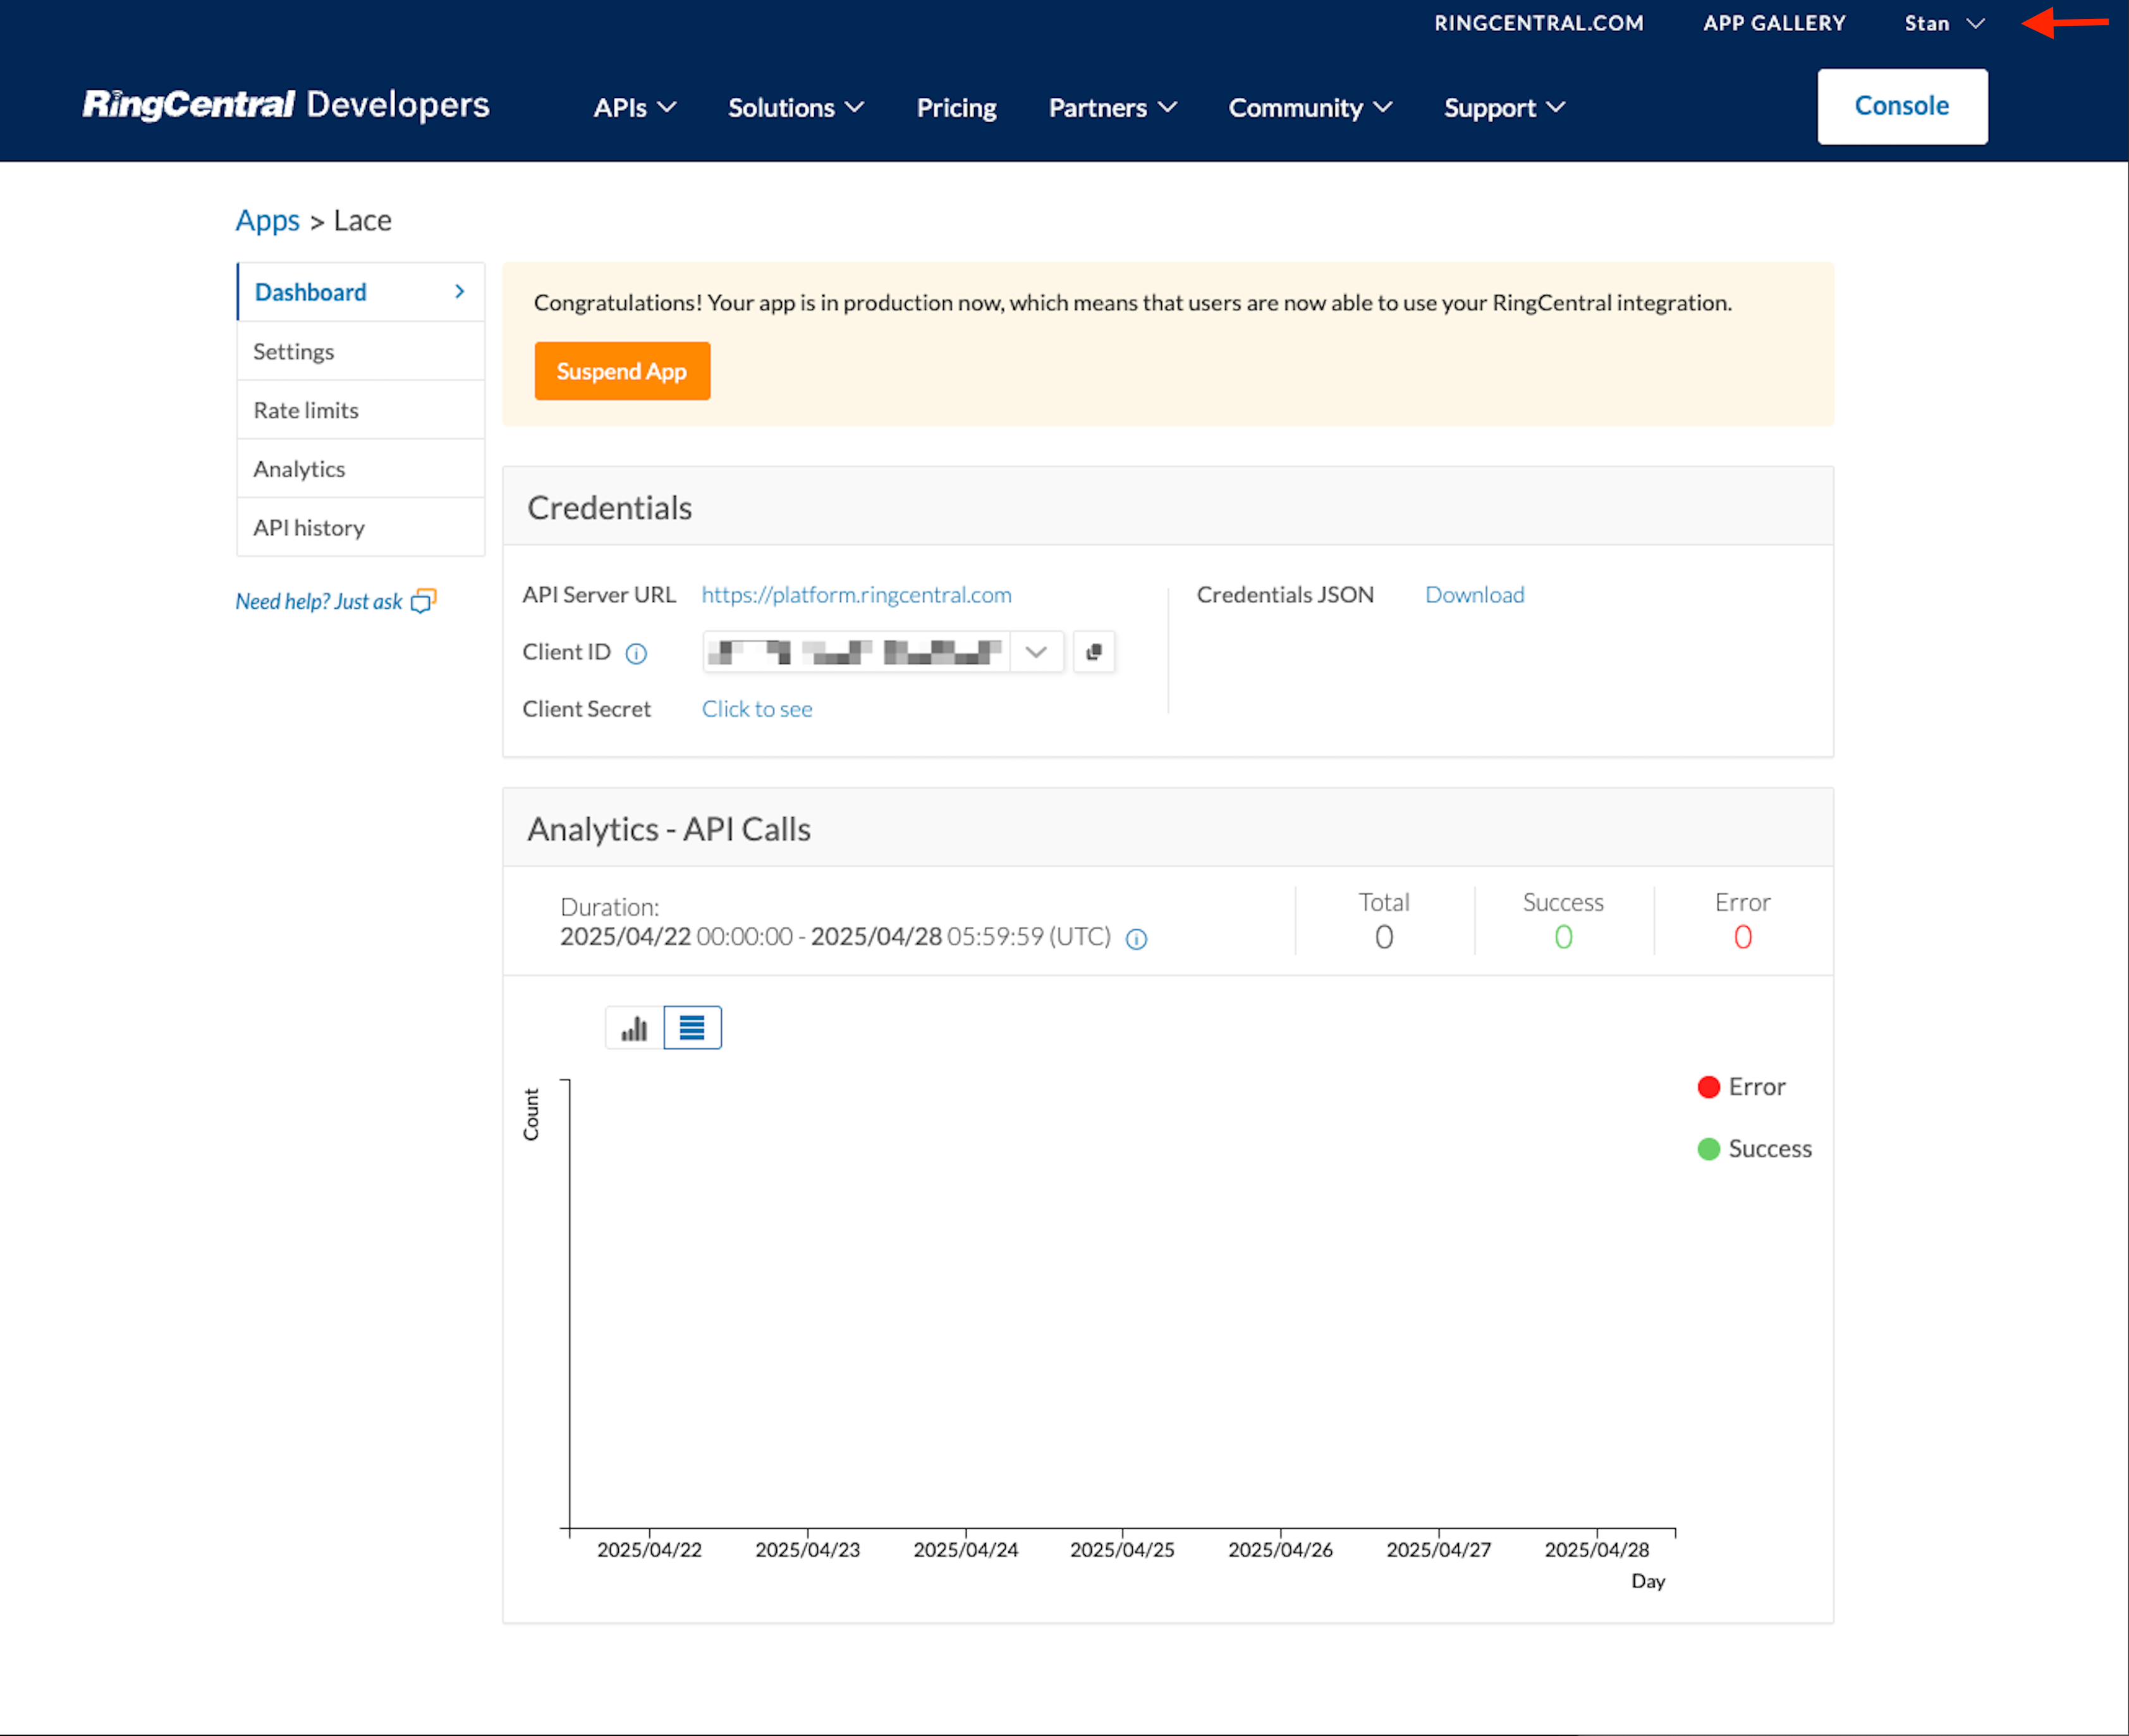
15. You will be presented with the app credentials screen. Click on the download
link to download a JSON file containing the app credentials
Note: The downloaded JSON file must be sent to your Lace representative
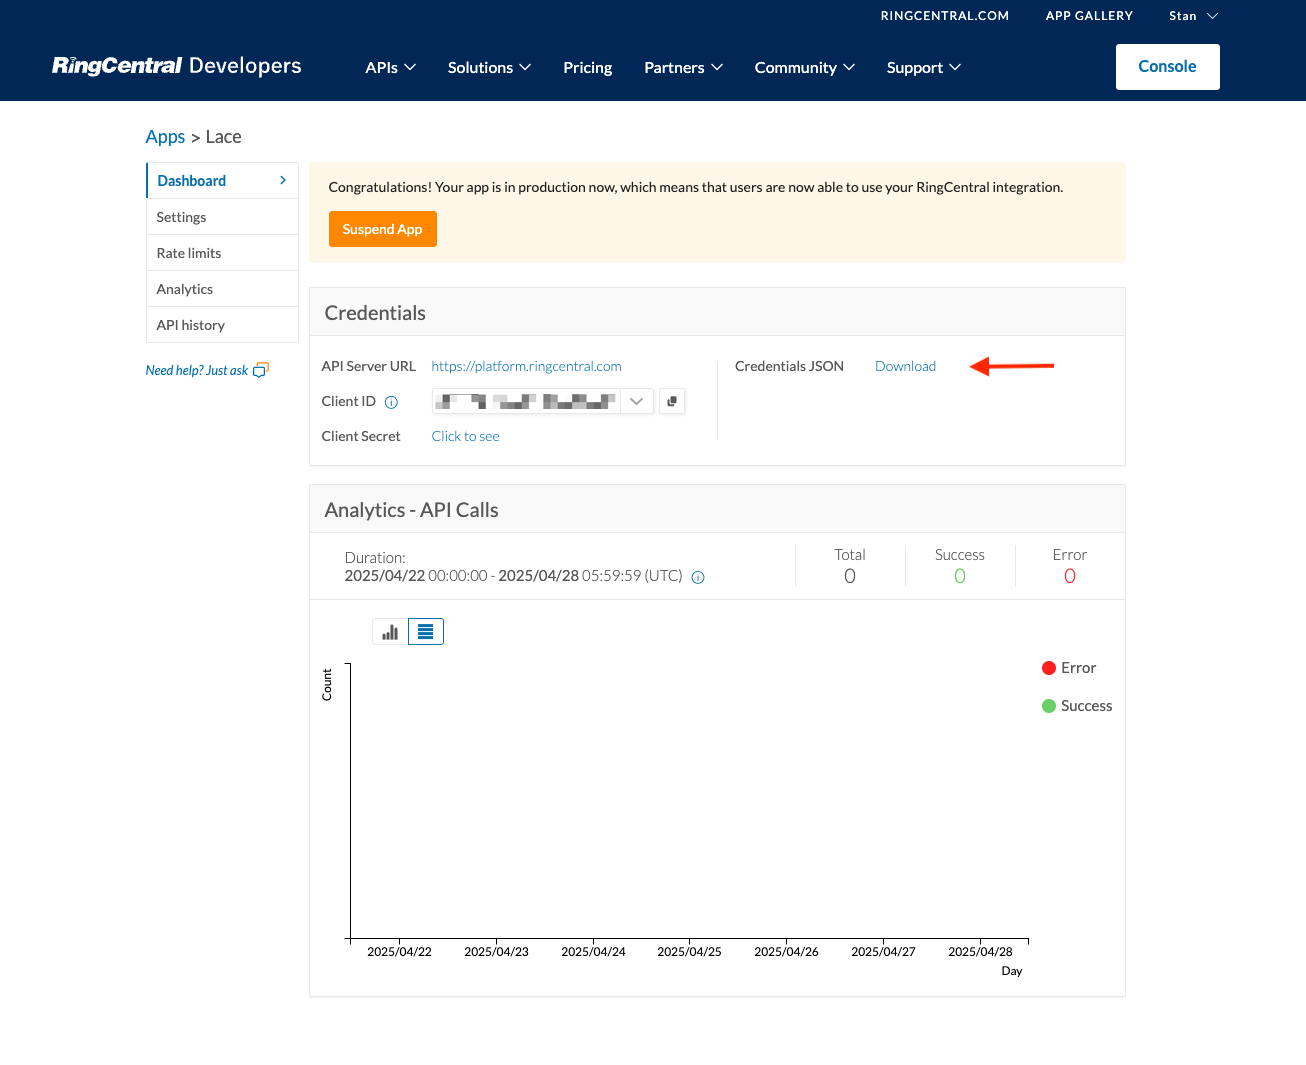
16. Copy the Client ID by clicking on the icon in the Client ID dropdown
17. After copying the Client ID, click on your user name dropdown in the top right
corner of the screen as shown by the arrow in this image
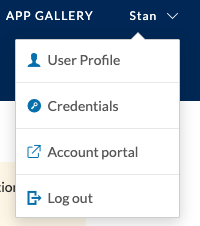
18. Select Credentials in the user dropdown
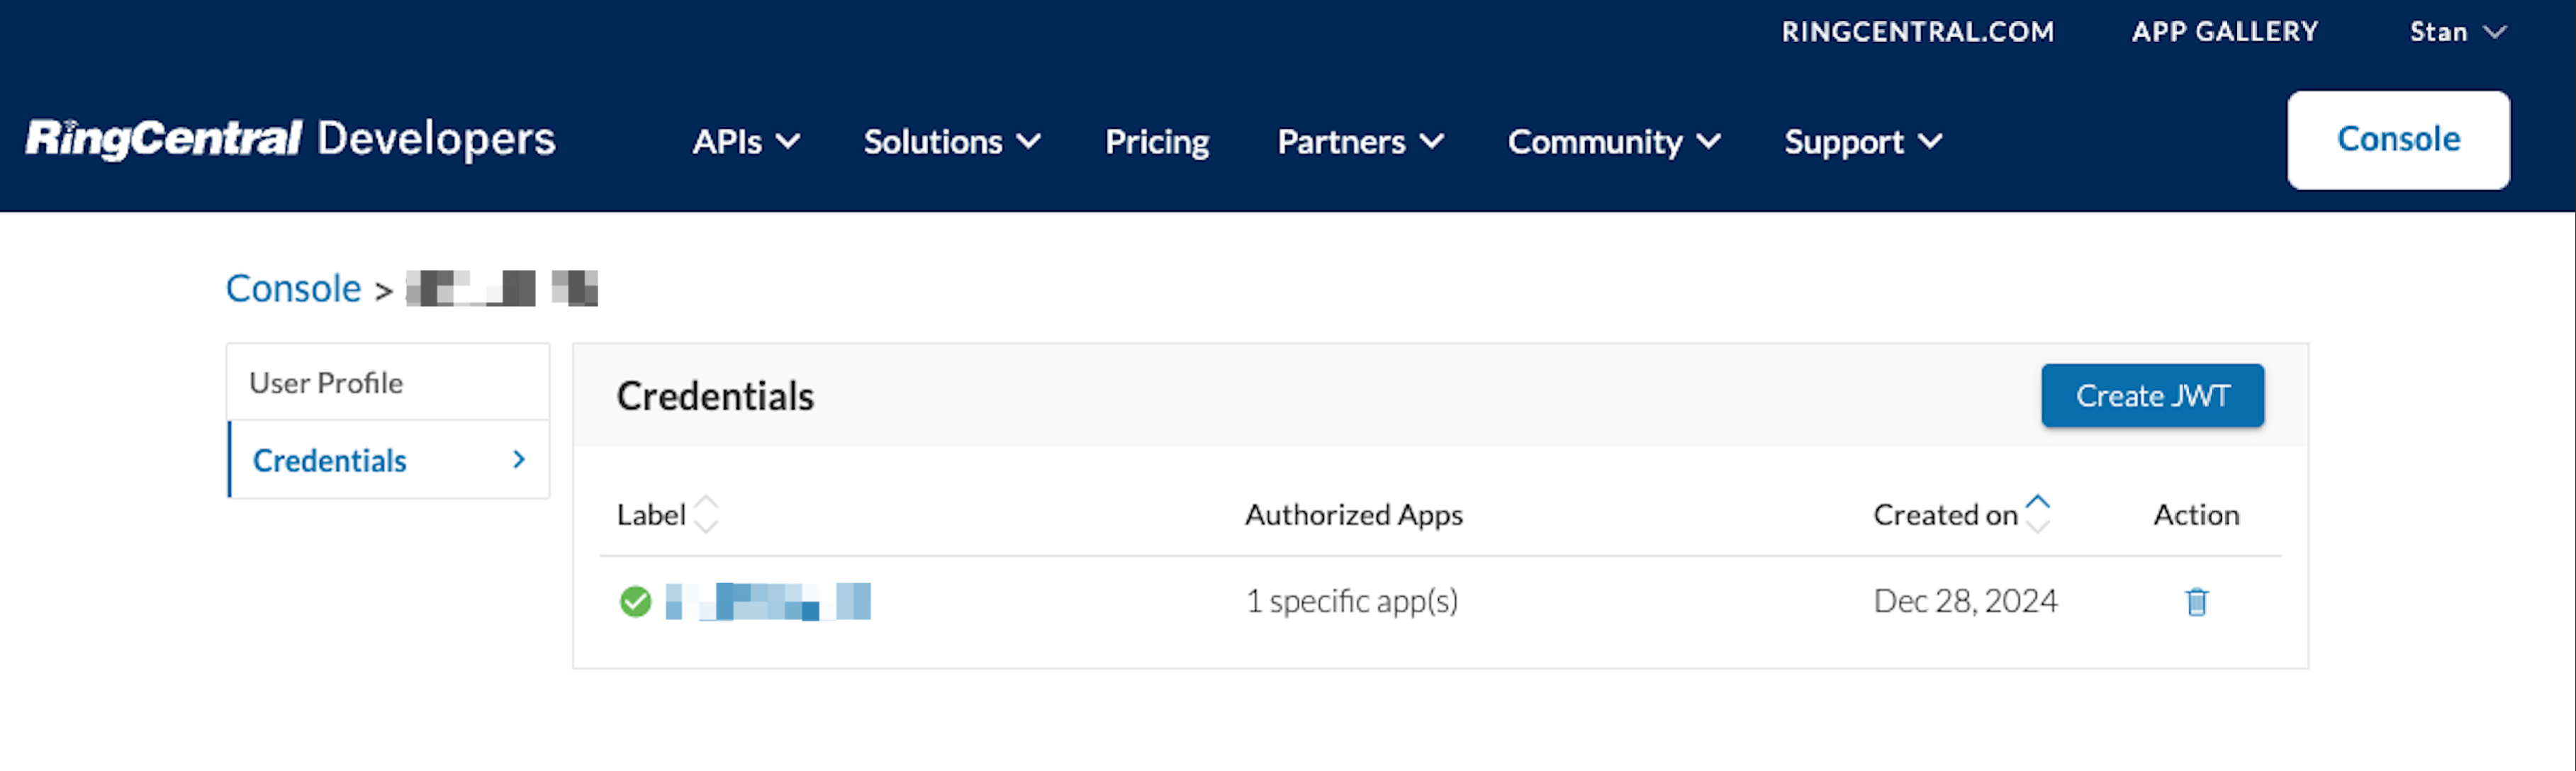
19. Click “Create JWT” to create a JWT token for the integration
20. Enter “Lace Integration” for the Label
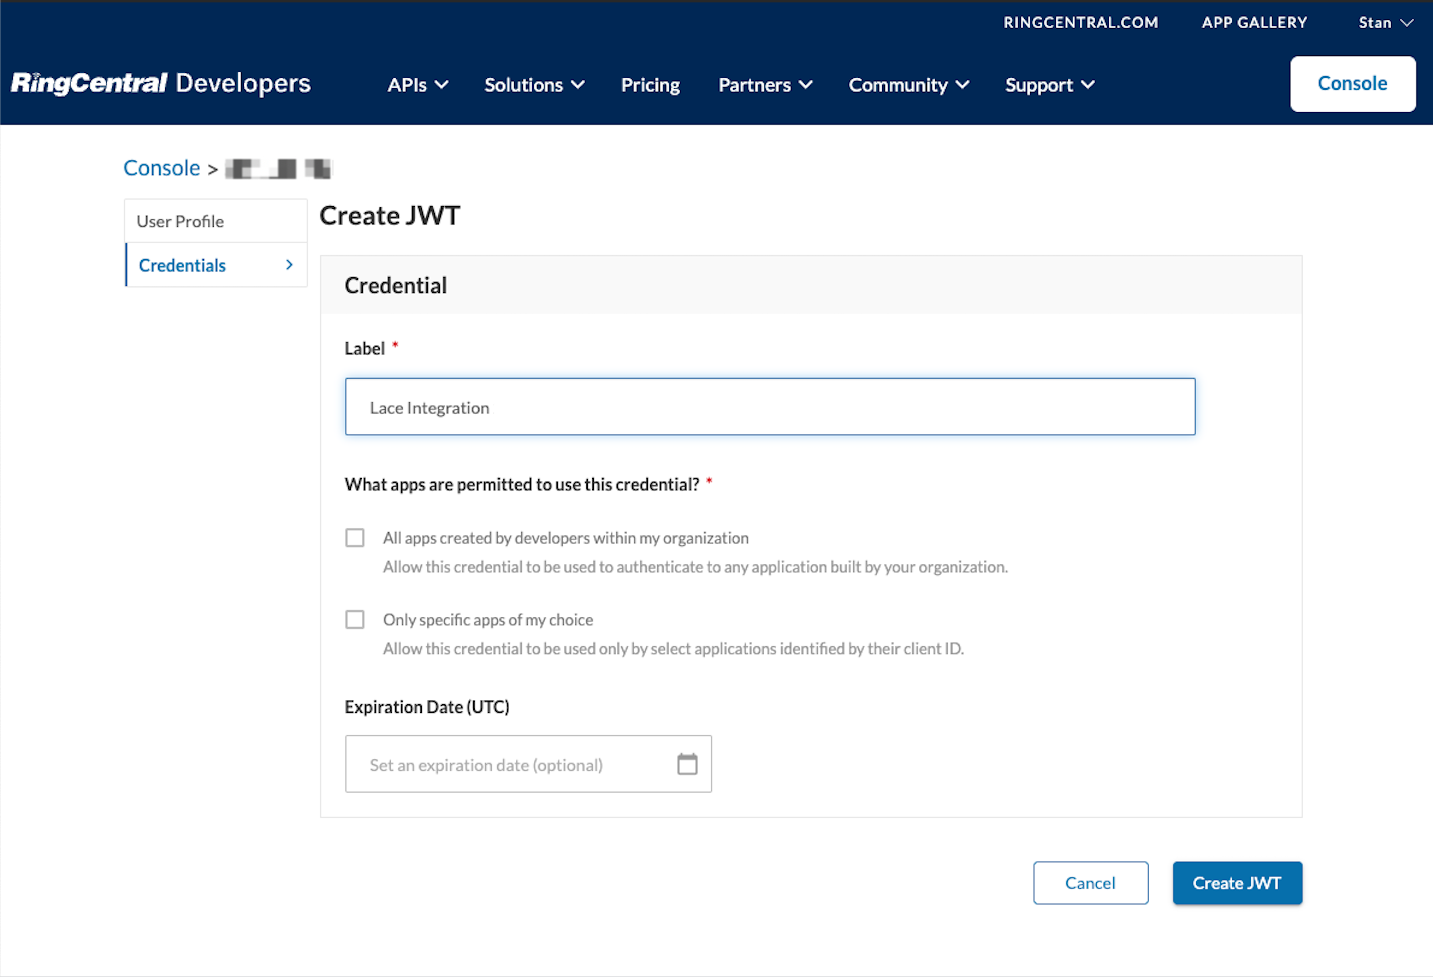
21. Under “What apps are permitted to use this credential?” select “Only specific
apps of my choice” and paste the Client ID copied earlier
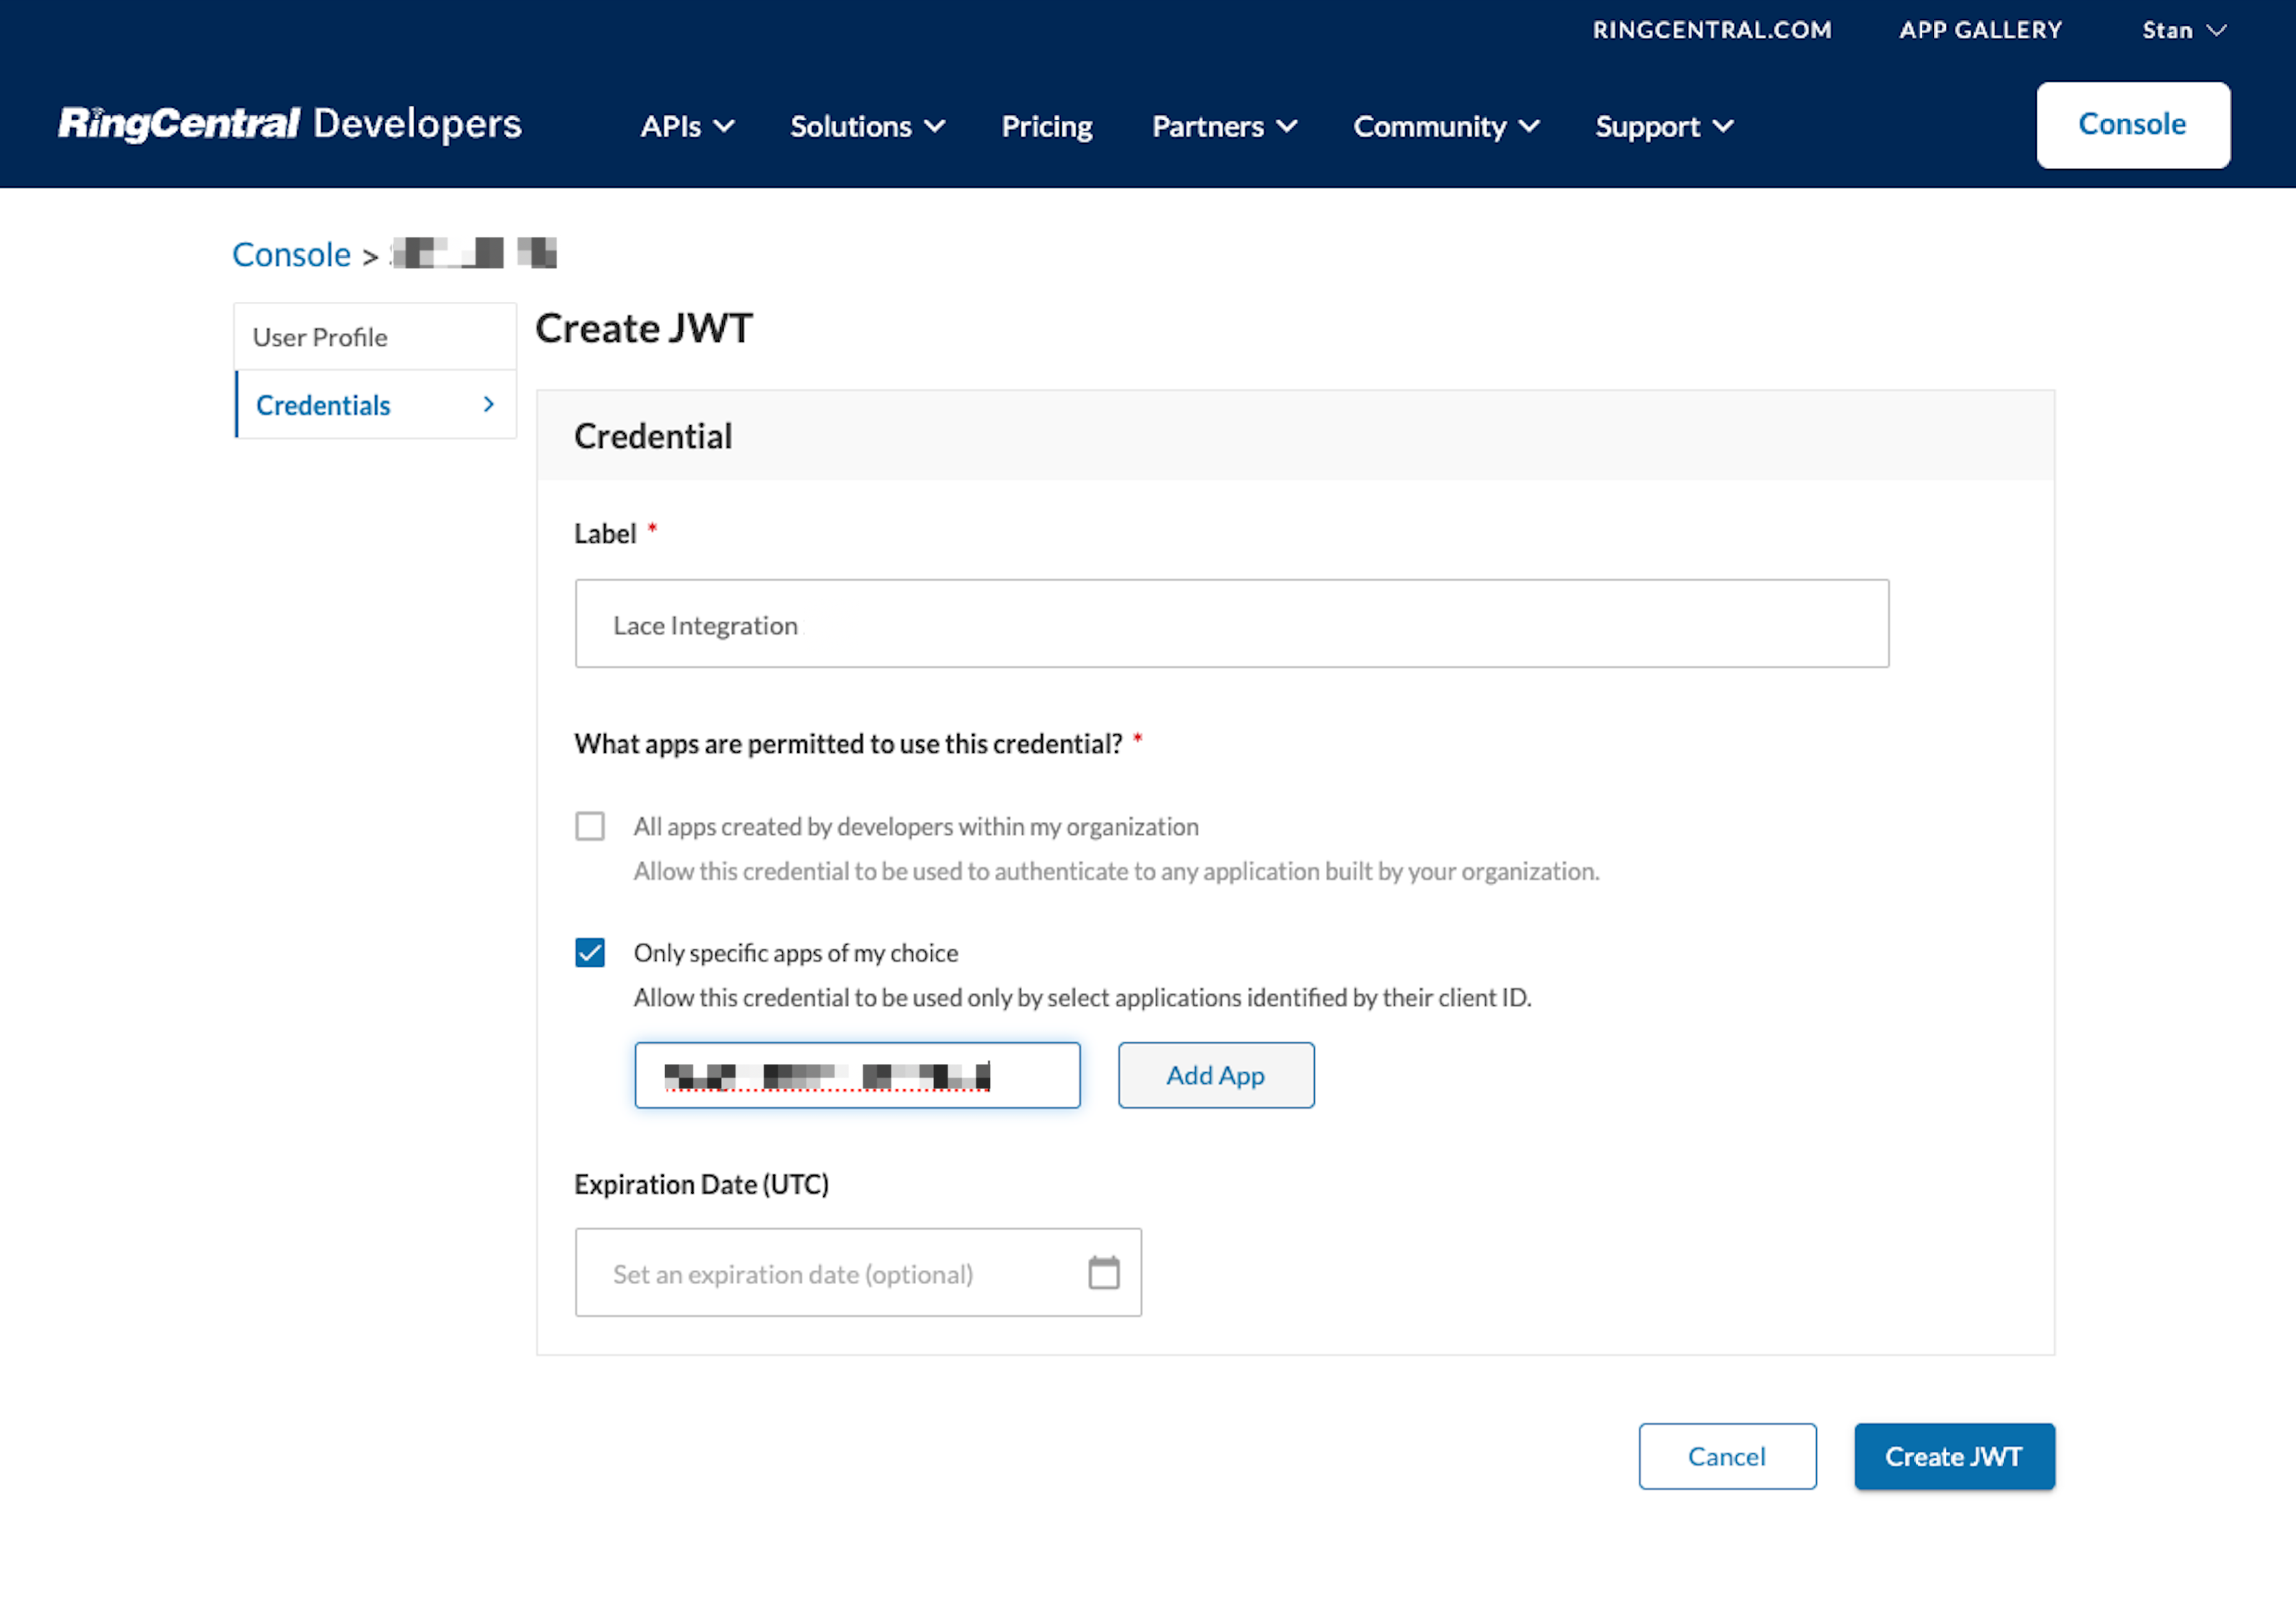
22. Click “Add App” for the Lace app
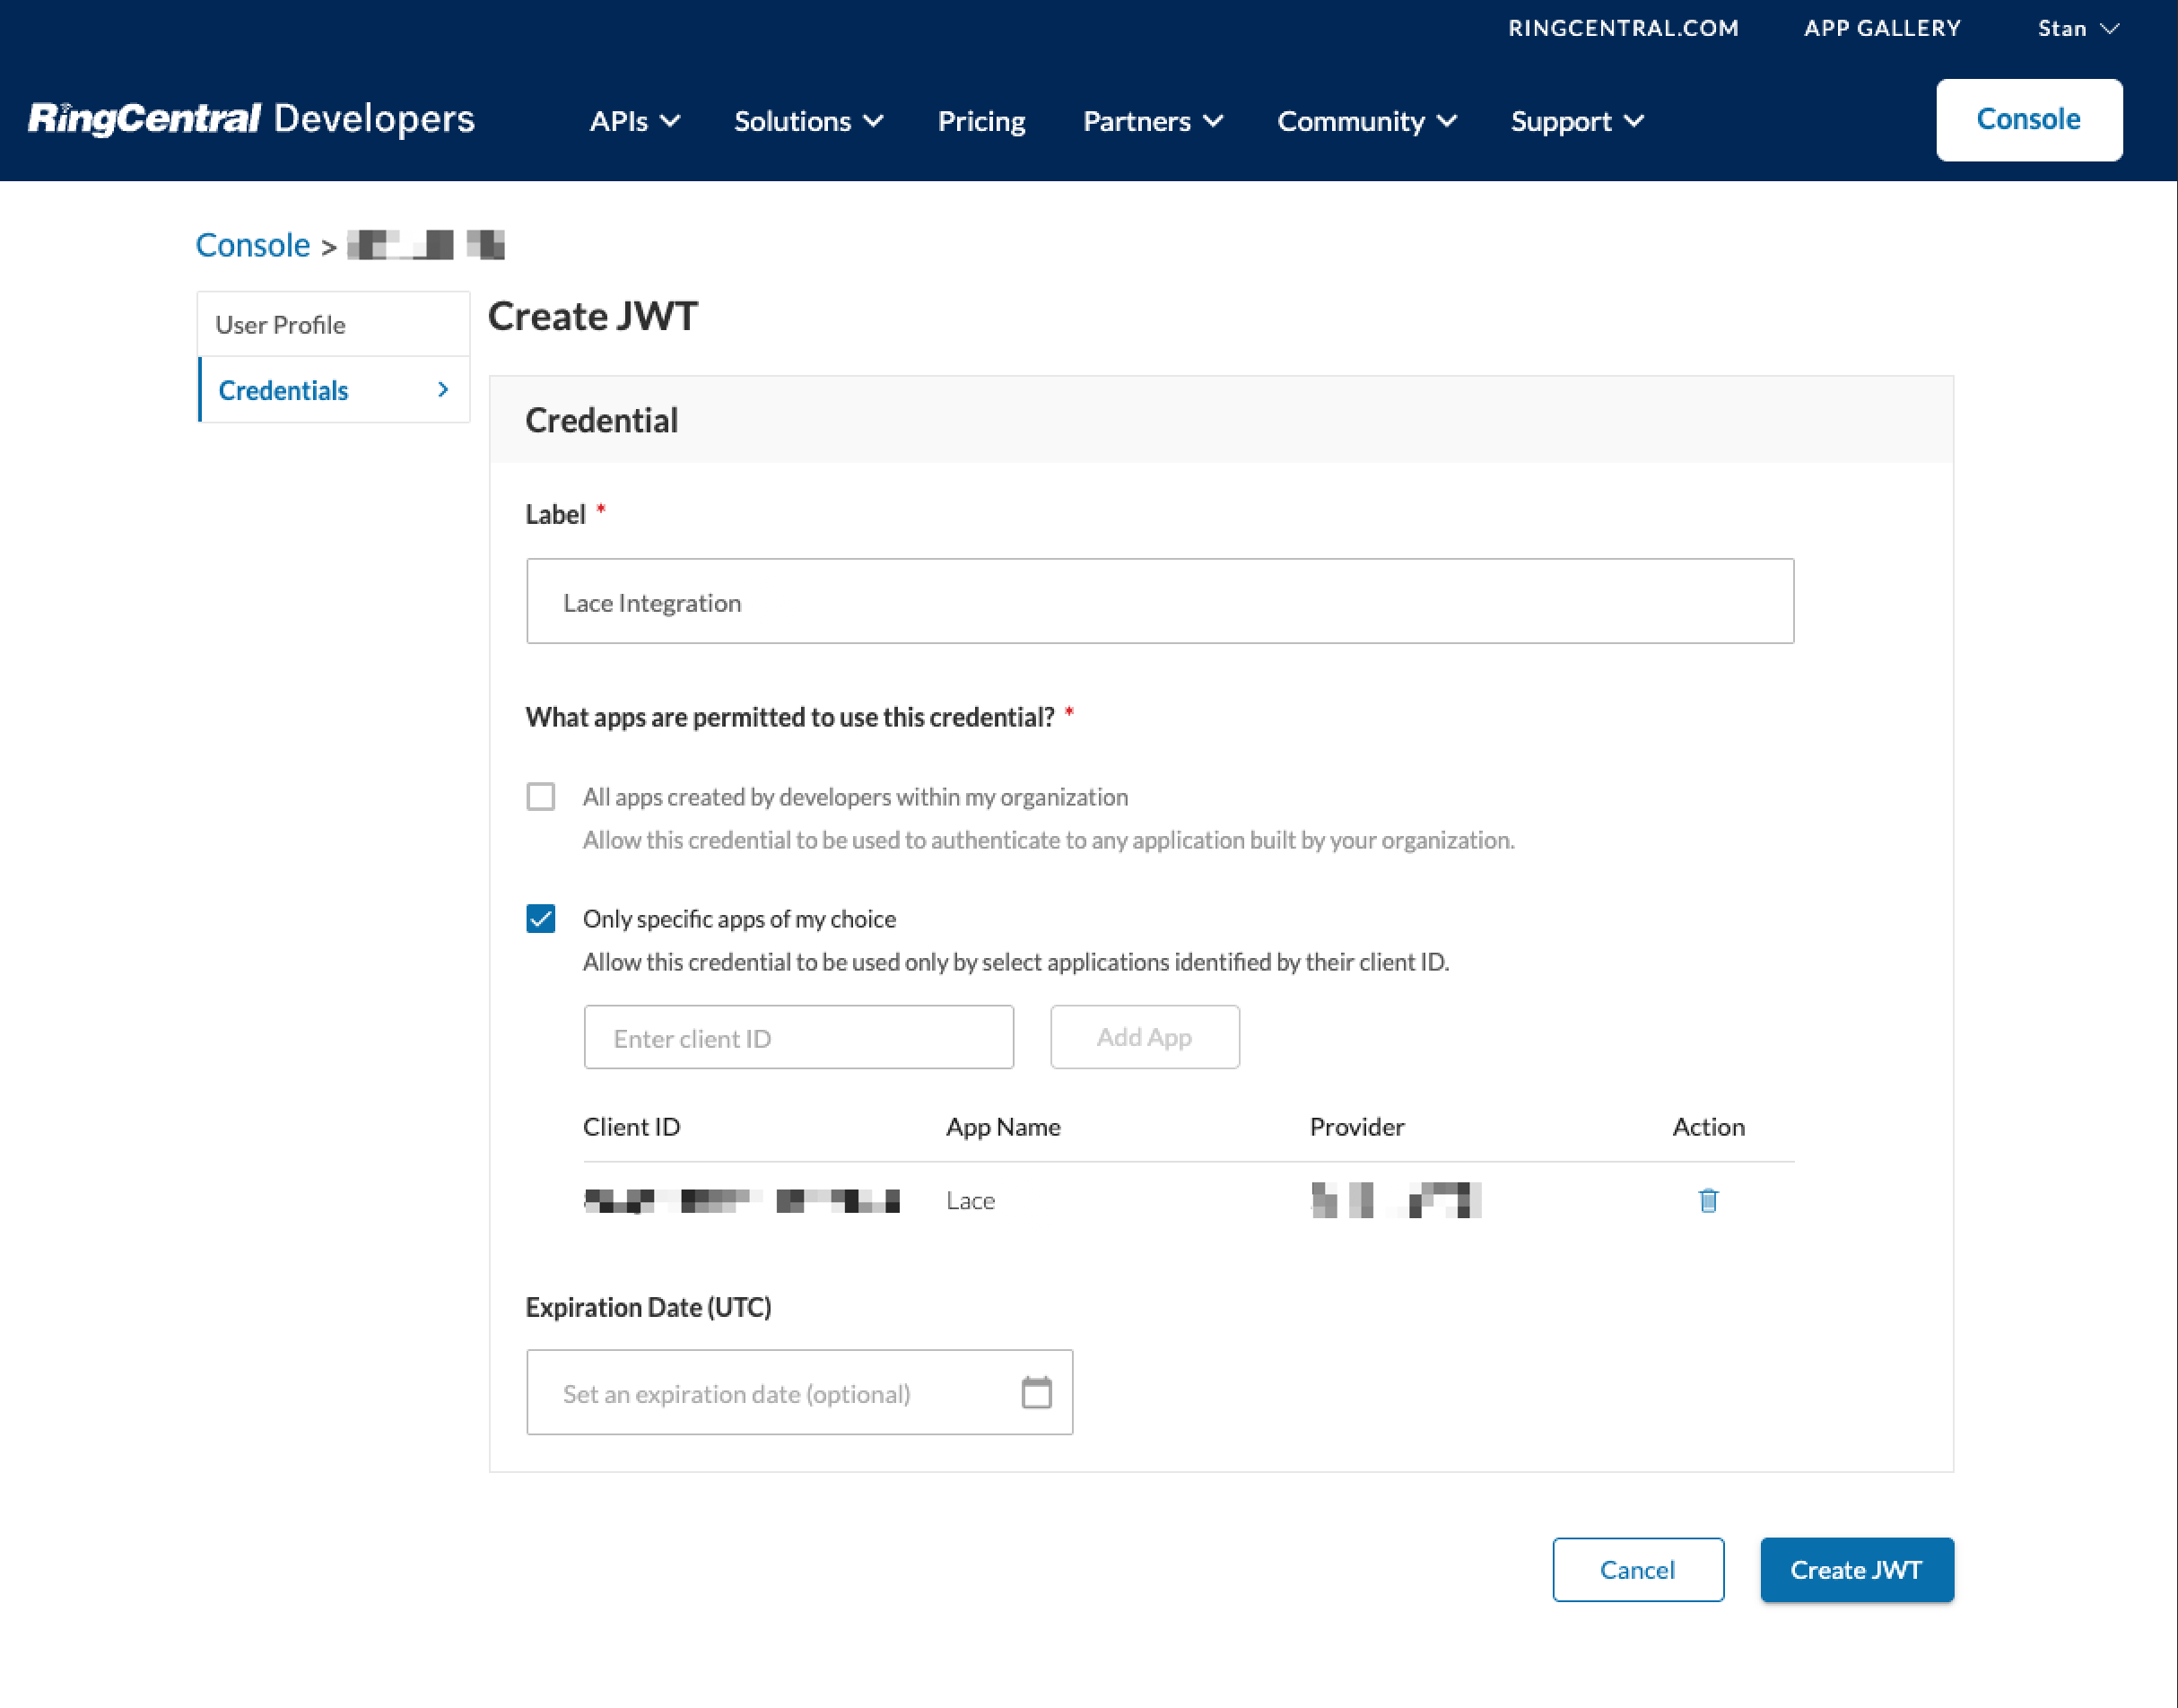
23. Click Create JWT to create the token
24. You will be presented with the final confirmation screen with the token. Click
on the copy button to copy the JWT
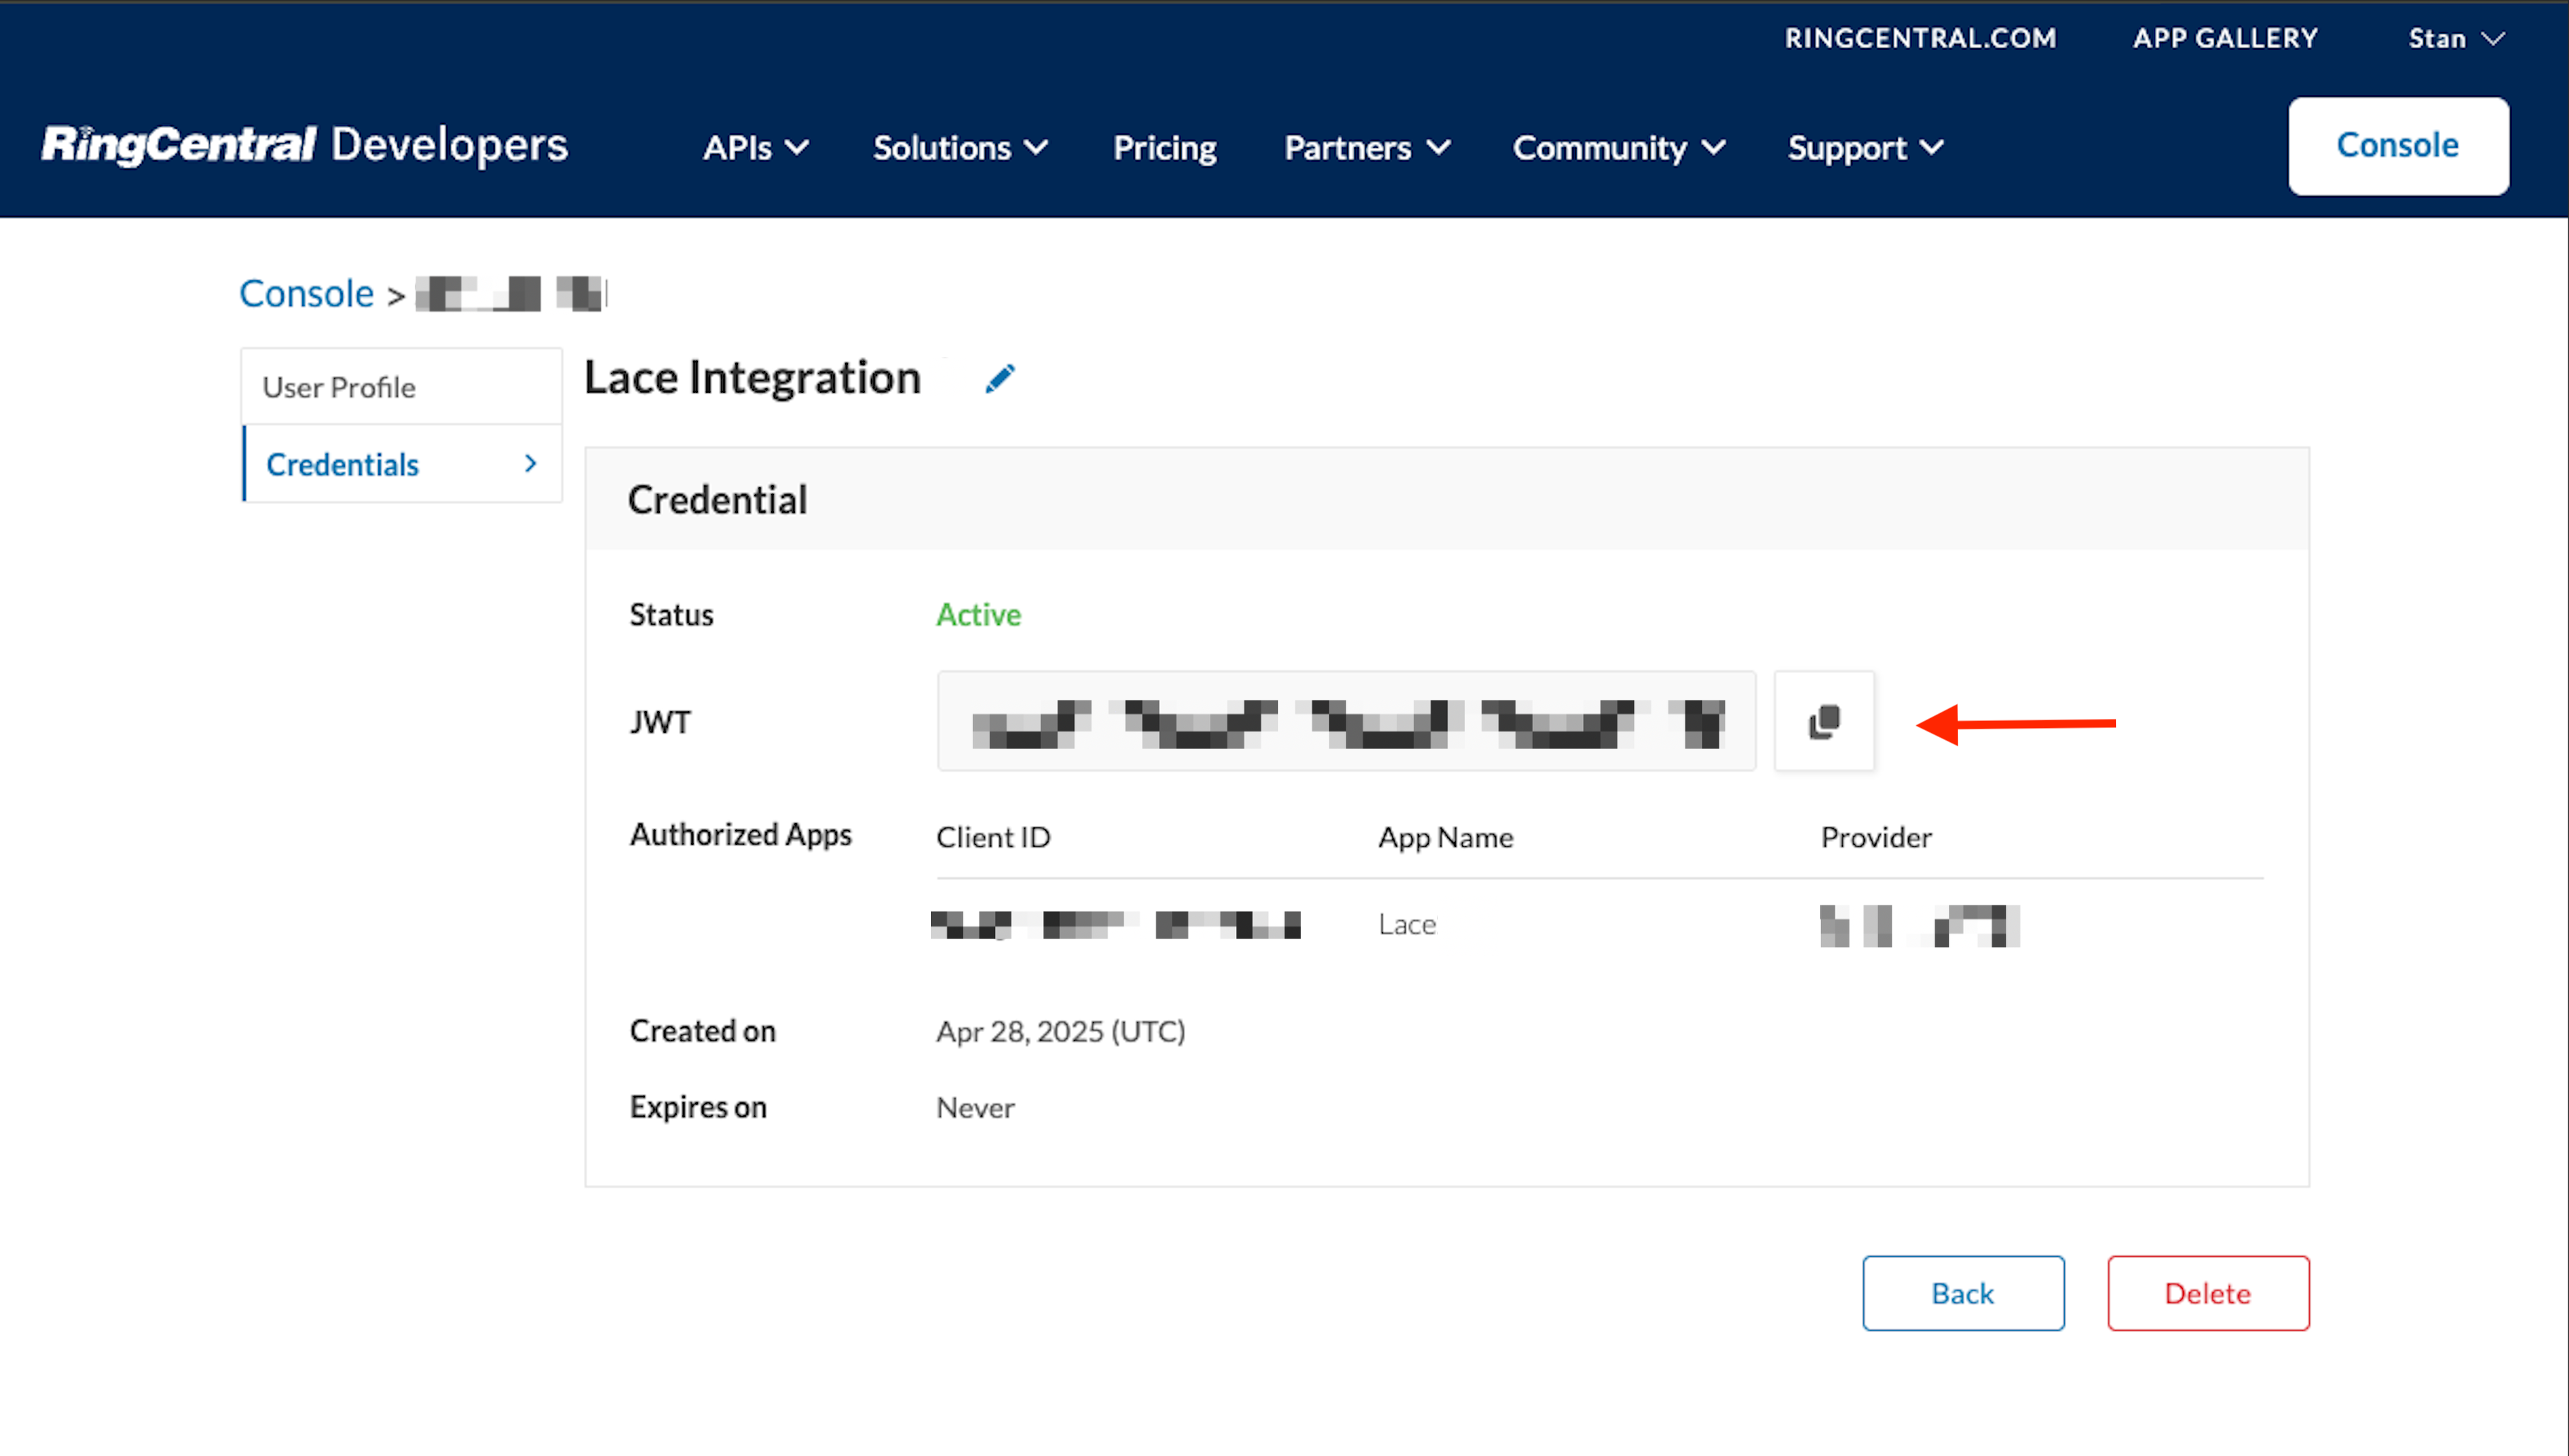
25. ⚠ IMPORTANT: Send the JWT to your Lace representative along with the credentials JSON file.